¶ Unboxing
¶ Tools required
- Work gloves
- Safety Glasses
- Flathead screwdriver
- Hammer
- Drill with phillips tip
Important
Work gloves are required when opening the crate. Failure to wear thick work gloves can result in cuts and/or injuries when opening the crate.
¶ Synopsis
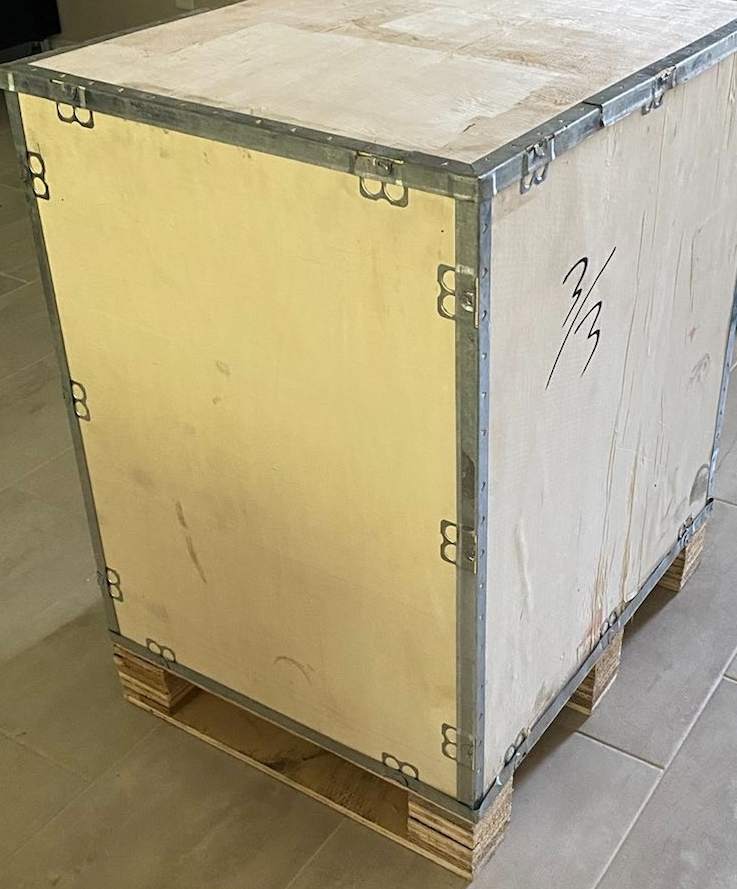
The 3D Labs HTX series 3D printers are shipped in a wooden tabbed crate.
The following instructions will guide you in opening the crate.
Some shipments may have a variation of the crate without tabs. In this case simply remove the top panel with a drill and phillips head tip. Remove the panel in the FRONT of the printer first using the drill, and lift the printer out of the box with 2 people.
¶ Instructions
- To open the crate, use a flathead screwdriver to pry open the tabs as shown here. Pry the tab completely vertical, this will allow the panel to be removed in the next step.
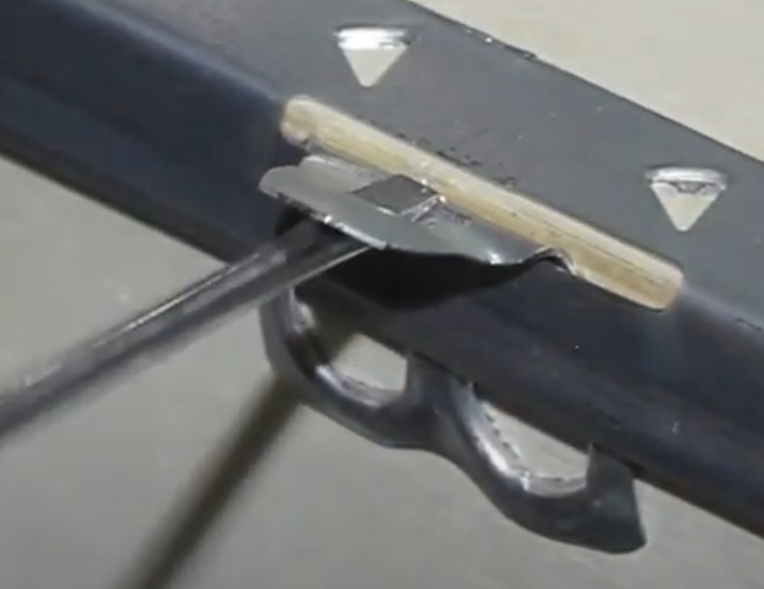
You can use the hammer and flathead screwdriver to pry the tabs up at first. Do this until the screwdriver's tip can be inserted into the tab hole, allowing you to pry open the tab.
-
Start by removing the top panel, then the front panel where the face of the printer is.
-
Two strong people should lift the printer out of the box via the plastic handles on either side of the machine
We recommend leaving the remainder of the crate panels in place. Shipping the machine back for repairs will be much easier if necessary.
Keep the packaging in case the machine needs to be sent back for repairs. If the packaging is not kept, customer will be responsible for providing adequate crating for the shipment and assumes all liability.
¶ Install the touch screen
¶ Synopsis
Install time: <5 minutes
The touch screen is shipped in a detached state to avoid damage during shipping. Follow this quick guide to install it and begin using the printer.
Open the front door of the printer, and the touch screen will be in a black box.
Remove this box from the printer and open it to retrieve the touch screen.
¶ Tools required
- 3mm hex wrench
- Orient the touch screen face down as shown in the picture.
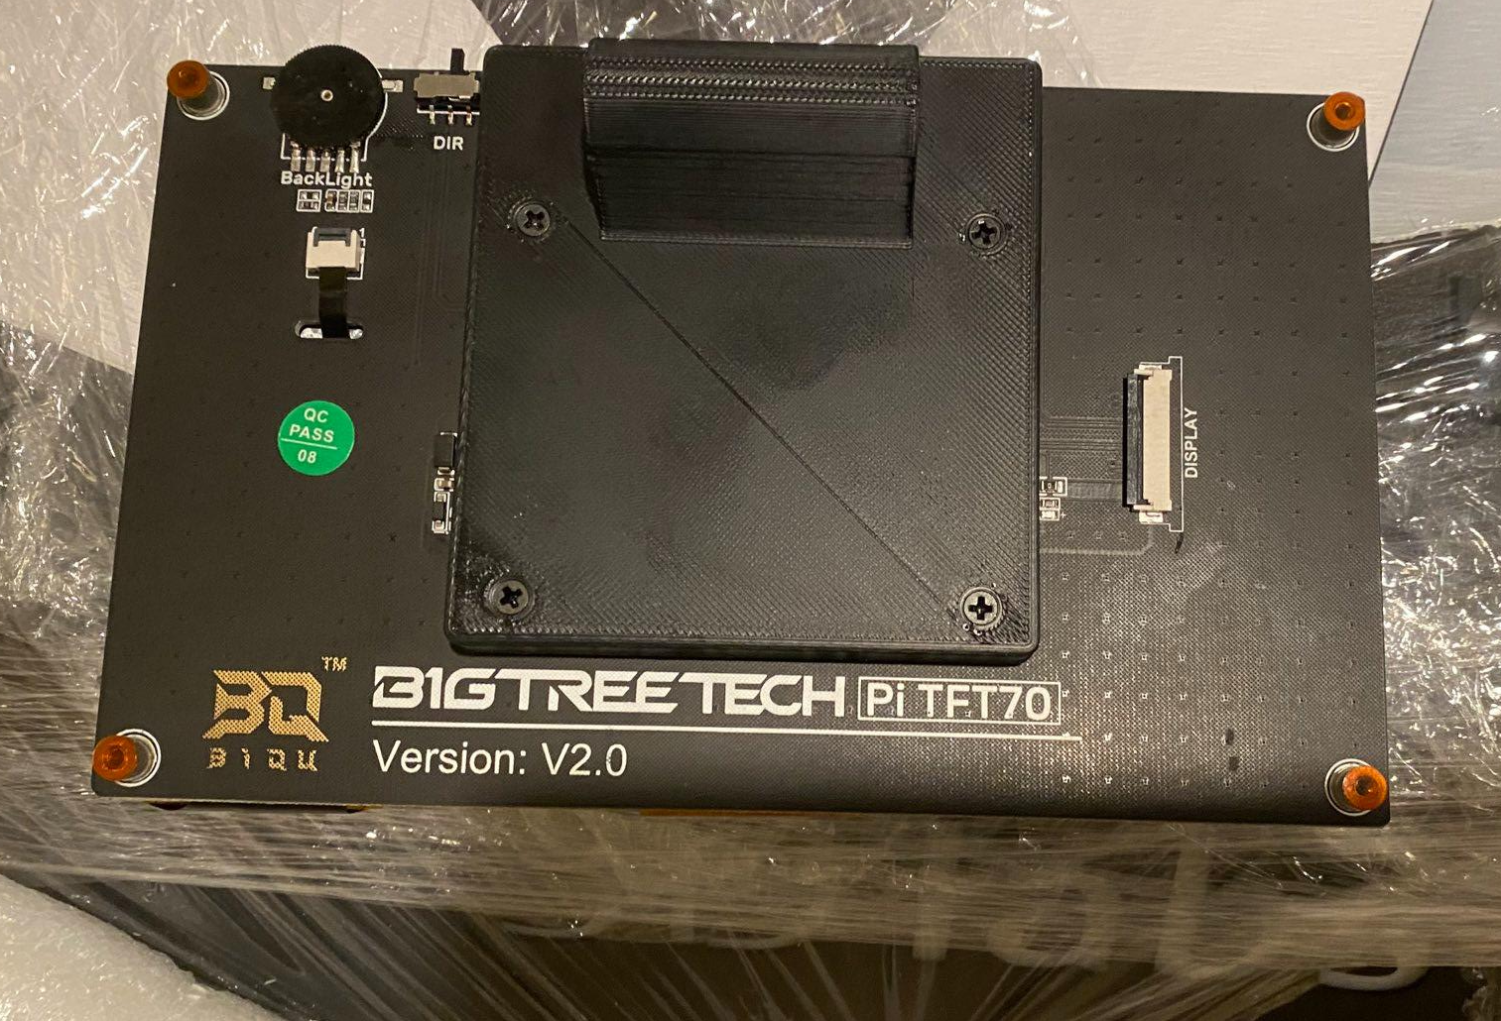
- Ensure that the connector lock is in the open position.
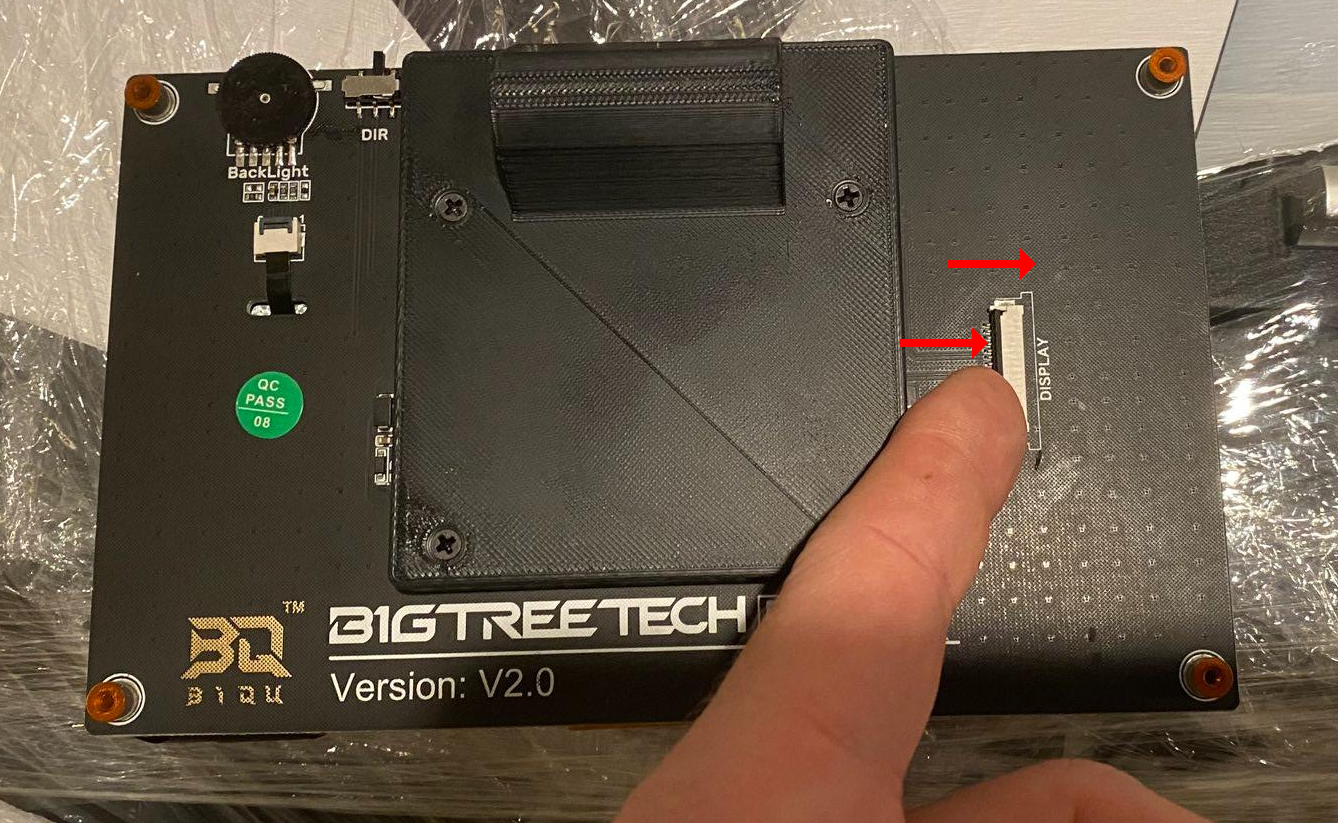
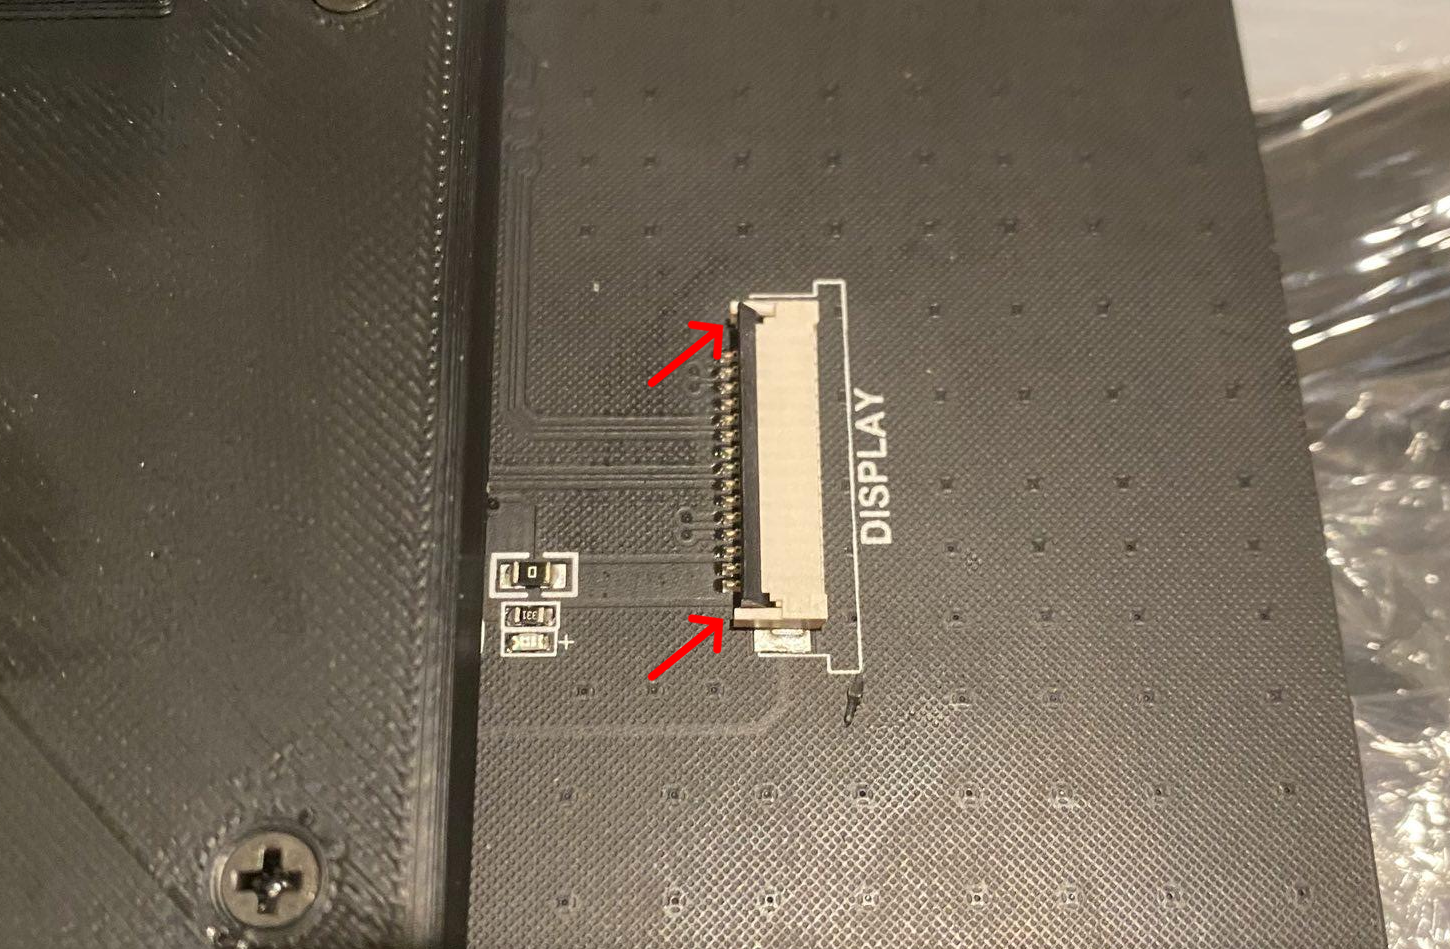
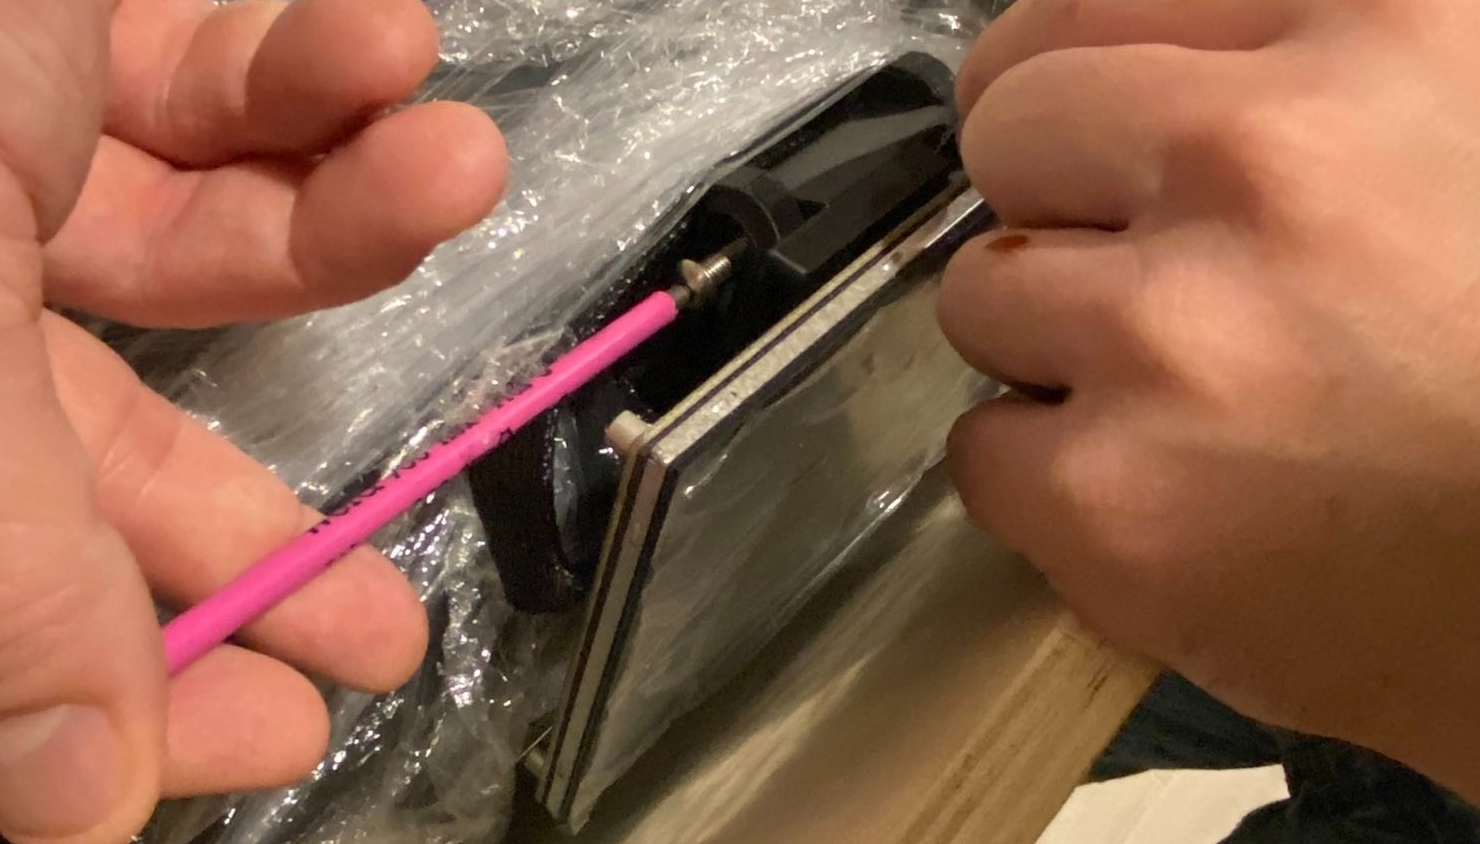
- Plug the cable into the connector with the pins facing up.
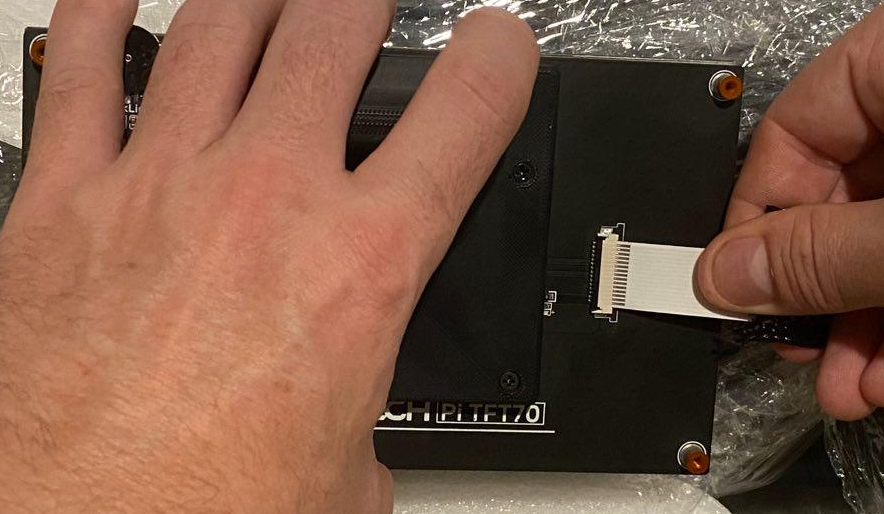
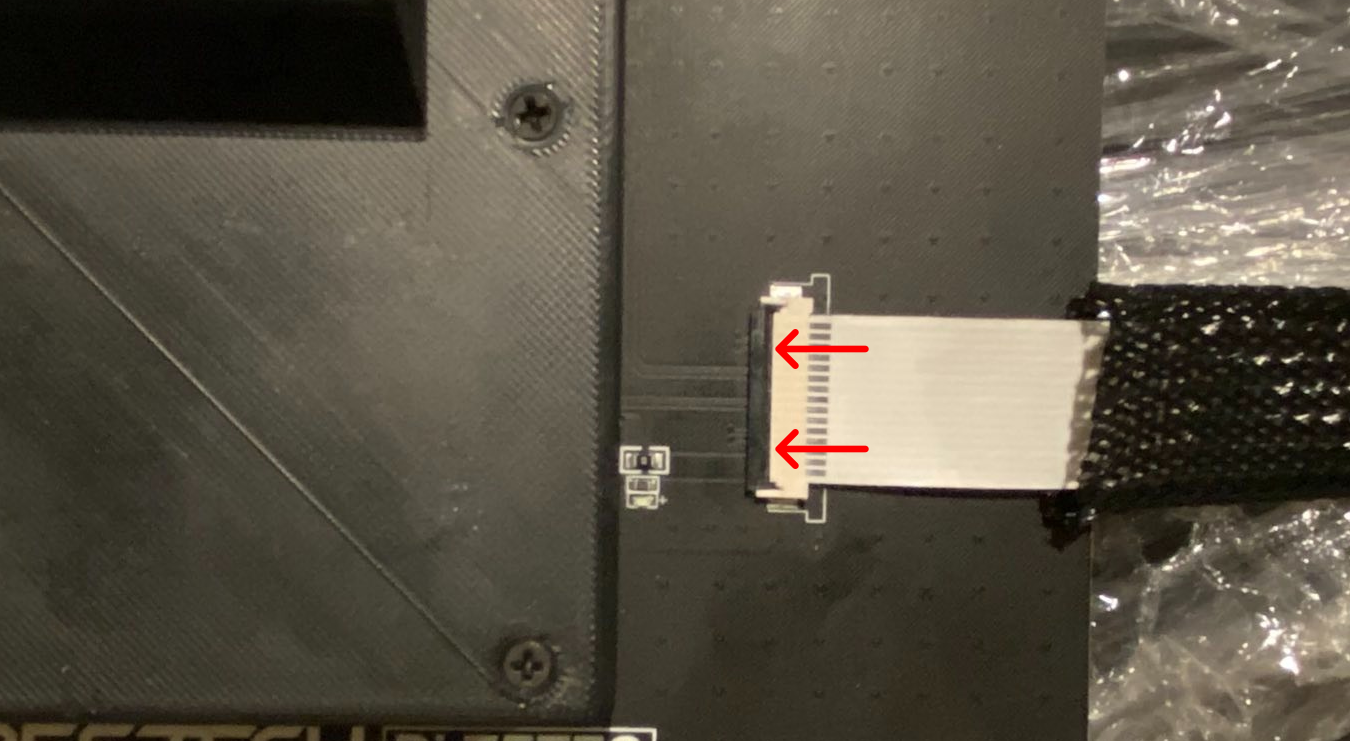
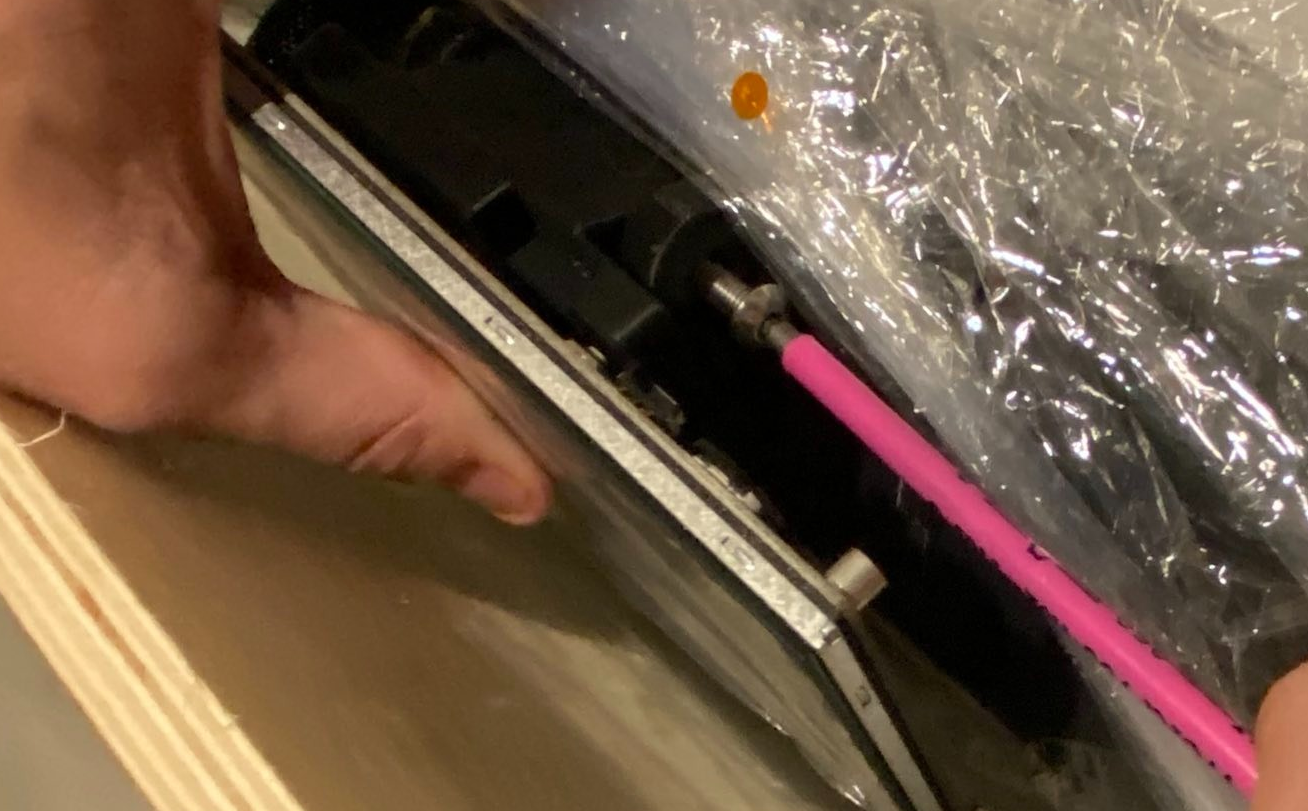
- The cable will go in as far as shown in the picture below. The pins will still be partially visible. This is normal.
- Press down the connector lock until you feel a gentle click. The cable is now locked into place.
- Carefully flip over the touch screen into the screen base and align the screw holes with the channel on the base.
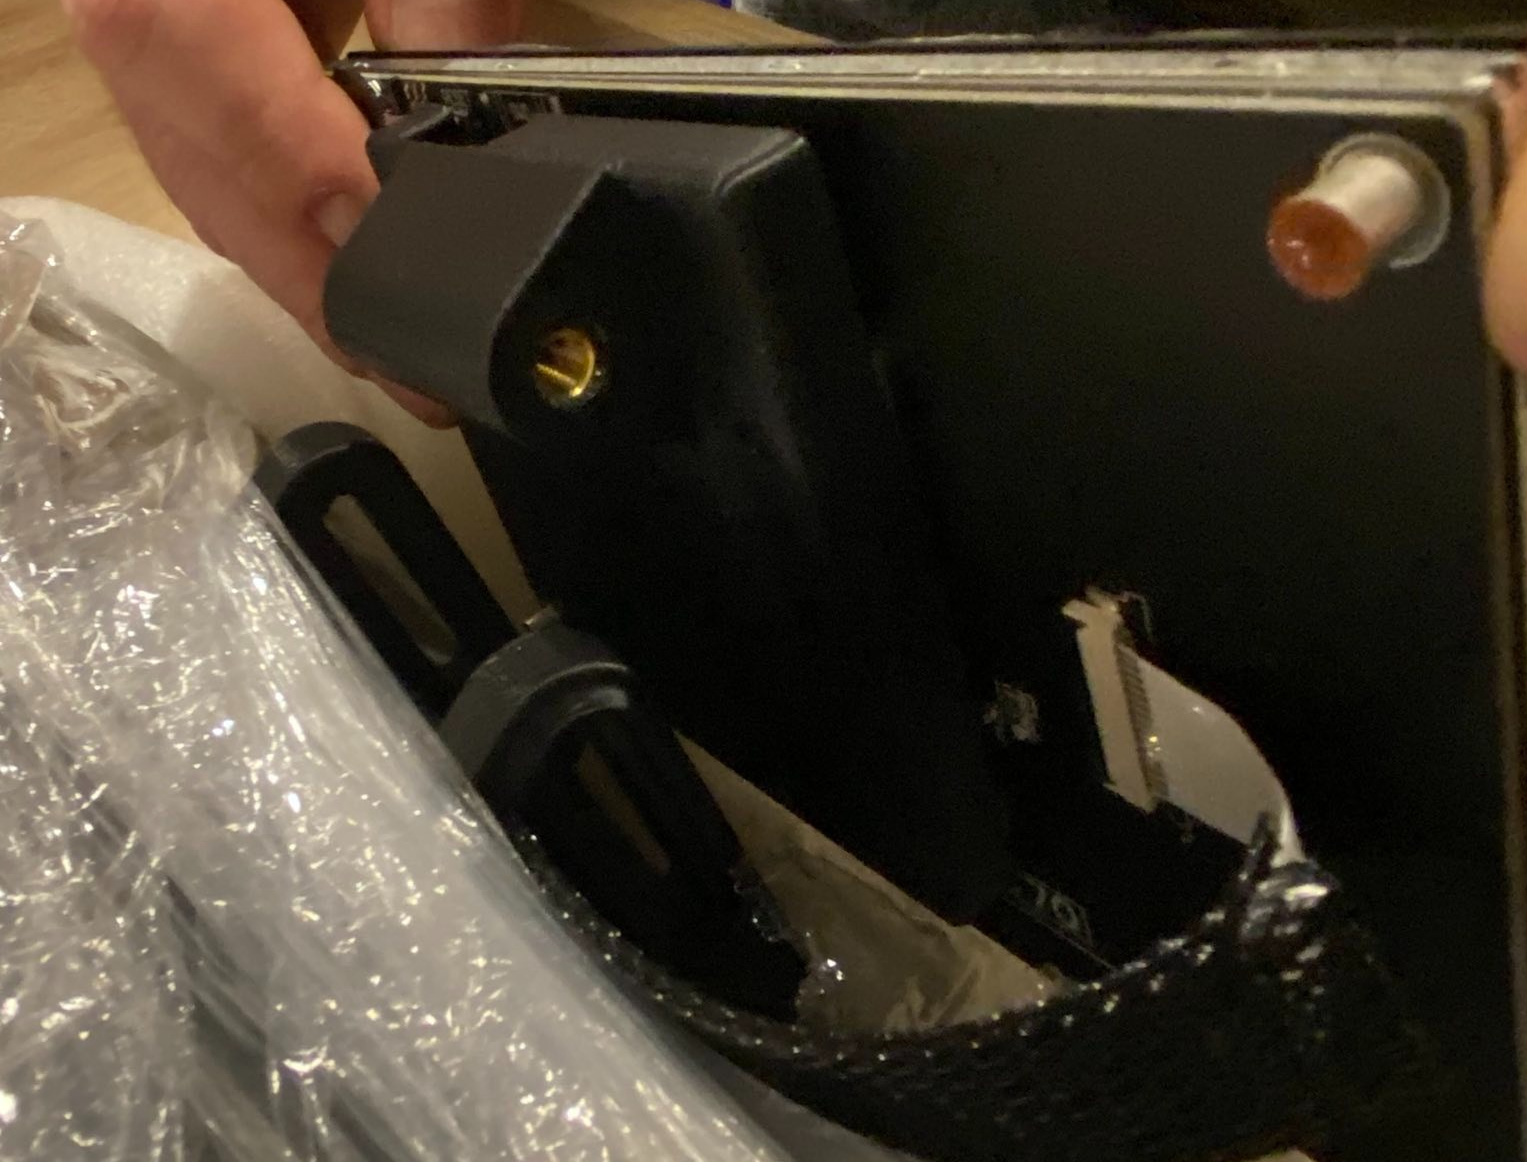
- Install the left and right screws with a 3mm hex wrench partially.
Important
Do not install the screws all the way at this step. We only need them to loosely hold the screen in place. Turn on the machine and make sure the touch screen works. If you see the user interface appear, proceed to the next steps. If it does not appear, please contact 3D Labs Support
- Turn on the 3D printer and make sure the screen powers on, and the user interface appears.
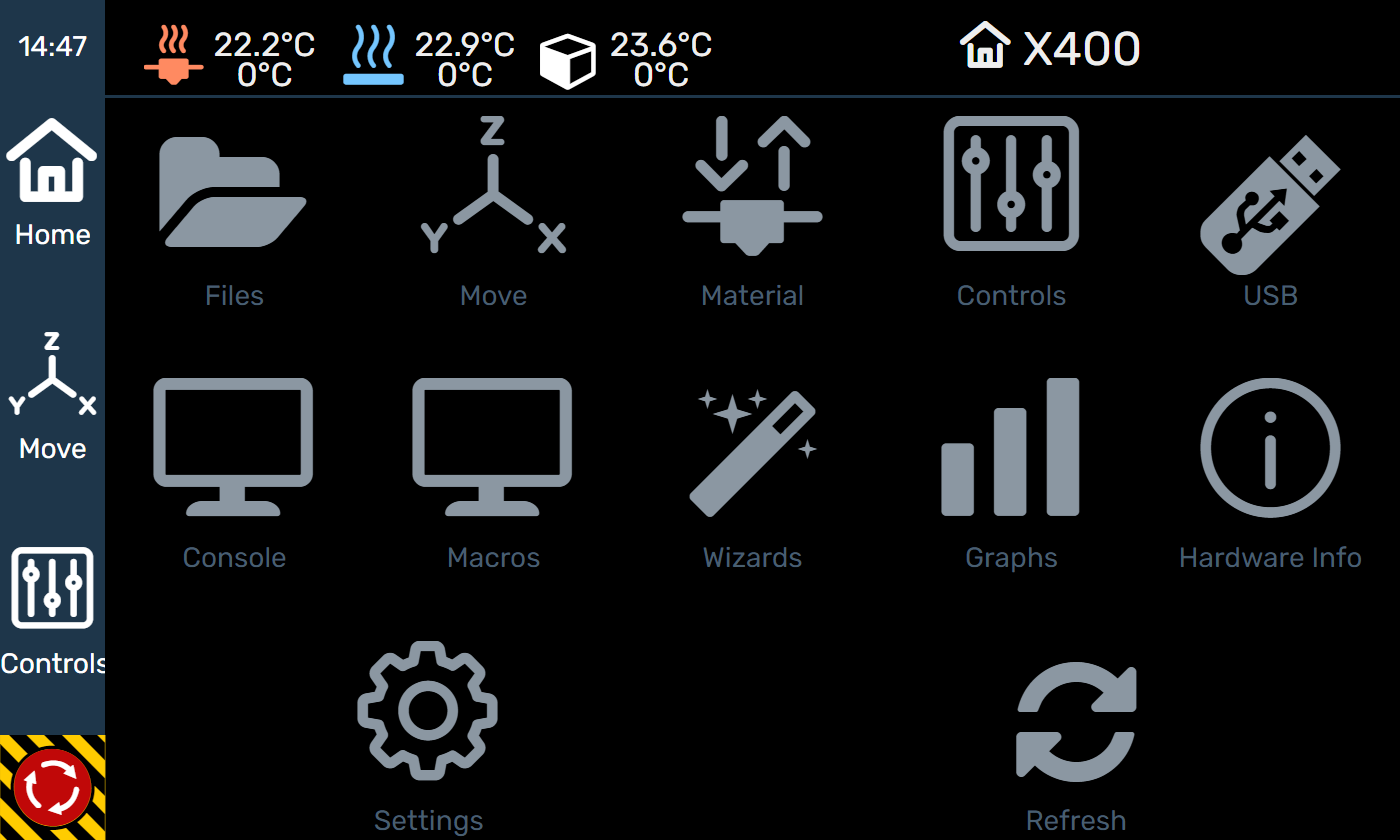
Important
Do not attempt to home the printer or press any buttons yet.
-
Turn off the 3D printer.
-
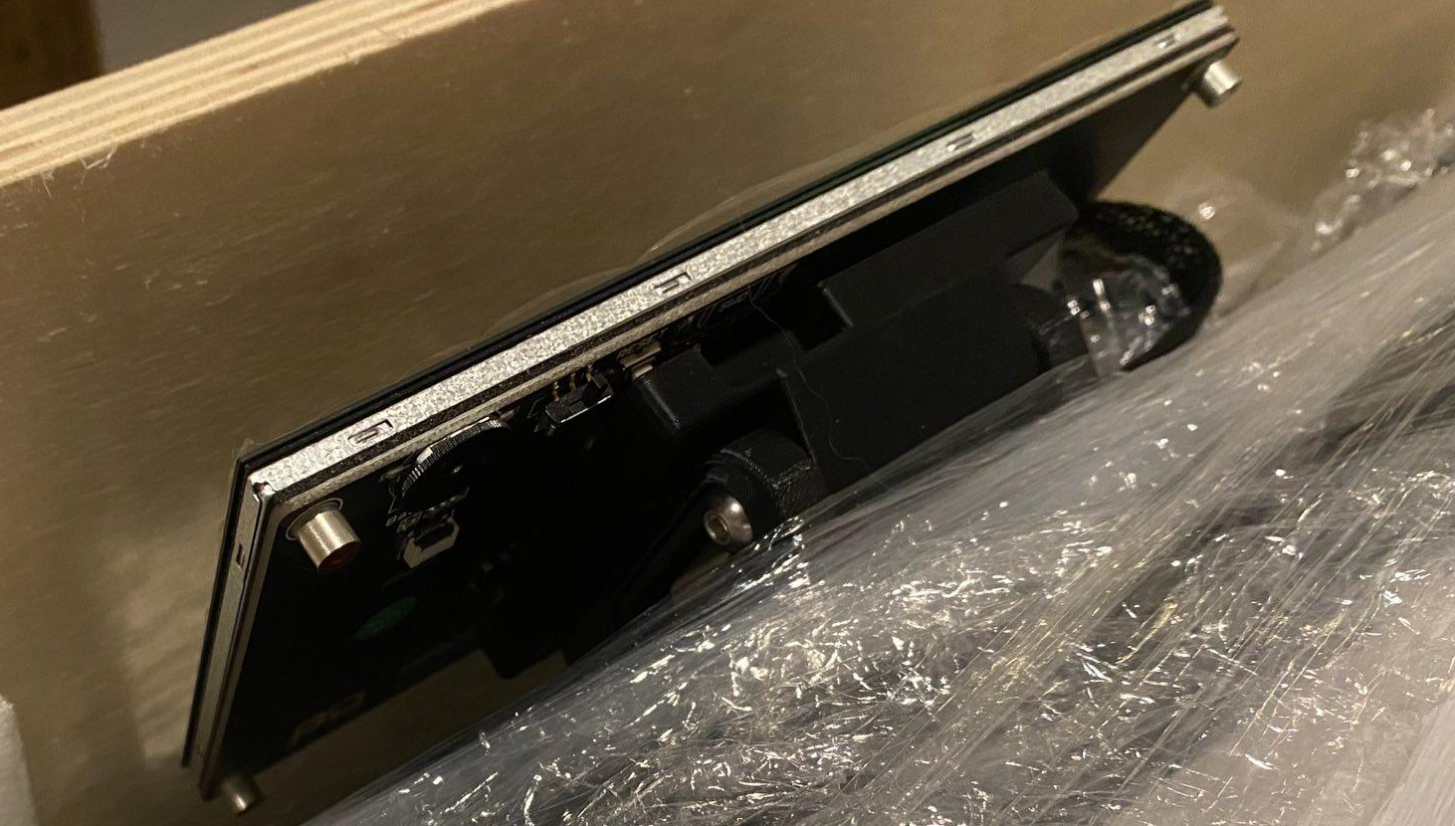
The screen position is adjustable, however we recommend installing it in the maximum height position.
-
When tightening the screws, hold the screen in the upper most position while making sure both sides are aligned.
-
Turn each screw until it stops turning with gentle force. Tighten the screw about 1/8 of a turn with force, so it's just snug but not overtightened.
-
Proceed to the next section.
¶ Unpack printer contents
¶ Tools required
- Phillips head screwdriver
¶ What's included in your kit
- 3D LABS HTX 3D PRINTER
- QUICK START REFERENCE GUIDE
- WORKING WITH HOTENDS GUIDE
- TOOL BAG CONTAINING
- 3x Hex (allen) wrenches, 2 x wrenches
- Spare screws and nuts bag
- Spare heater cartridge and thermistor
- Spare low temp hotend
- Spare high temp hotend w/brass nozzle
- Spare endstop, filament runout sensor
- 2 x spare brass nozzles
- Spare spring, knurled nut, and screw for tension assembly
- Spare stepper driver
- USB thumb drive
- Tweezers, Pin for clearing nozzle clogs
- Phillips head screwdriver
- HyperLok™ Bed Adhesive
- Work gloves
- QA prints
- 2 x 1KG rolls of ABS (or ASA)
- Textured PEI print surface
- 12 gauge 20 amp power cable
- Touch Screen
- USB-C cable
¶ Instructions
- Unscrew the gantry guard tabs with a hex key and then detach them before doing anything else.
Tip
To remove the black gantry guards: Snap them off the rear axis rod by pulling the rear tab up from underneath. Use moderate force (this is normal); applying slight left or right pressure helps them release.
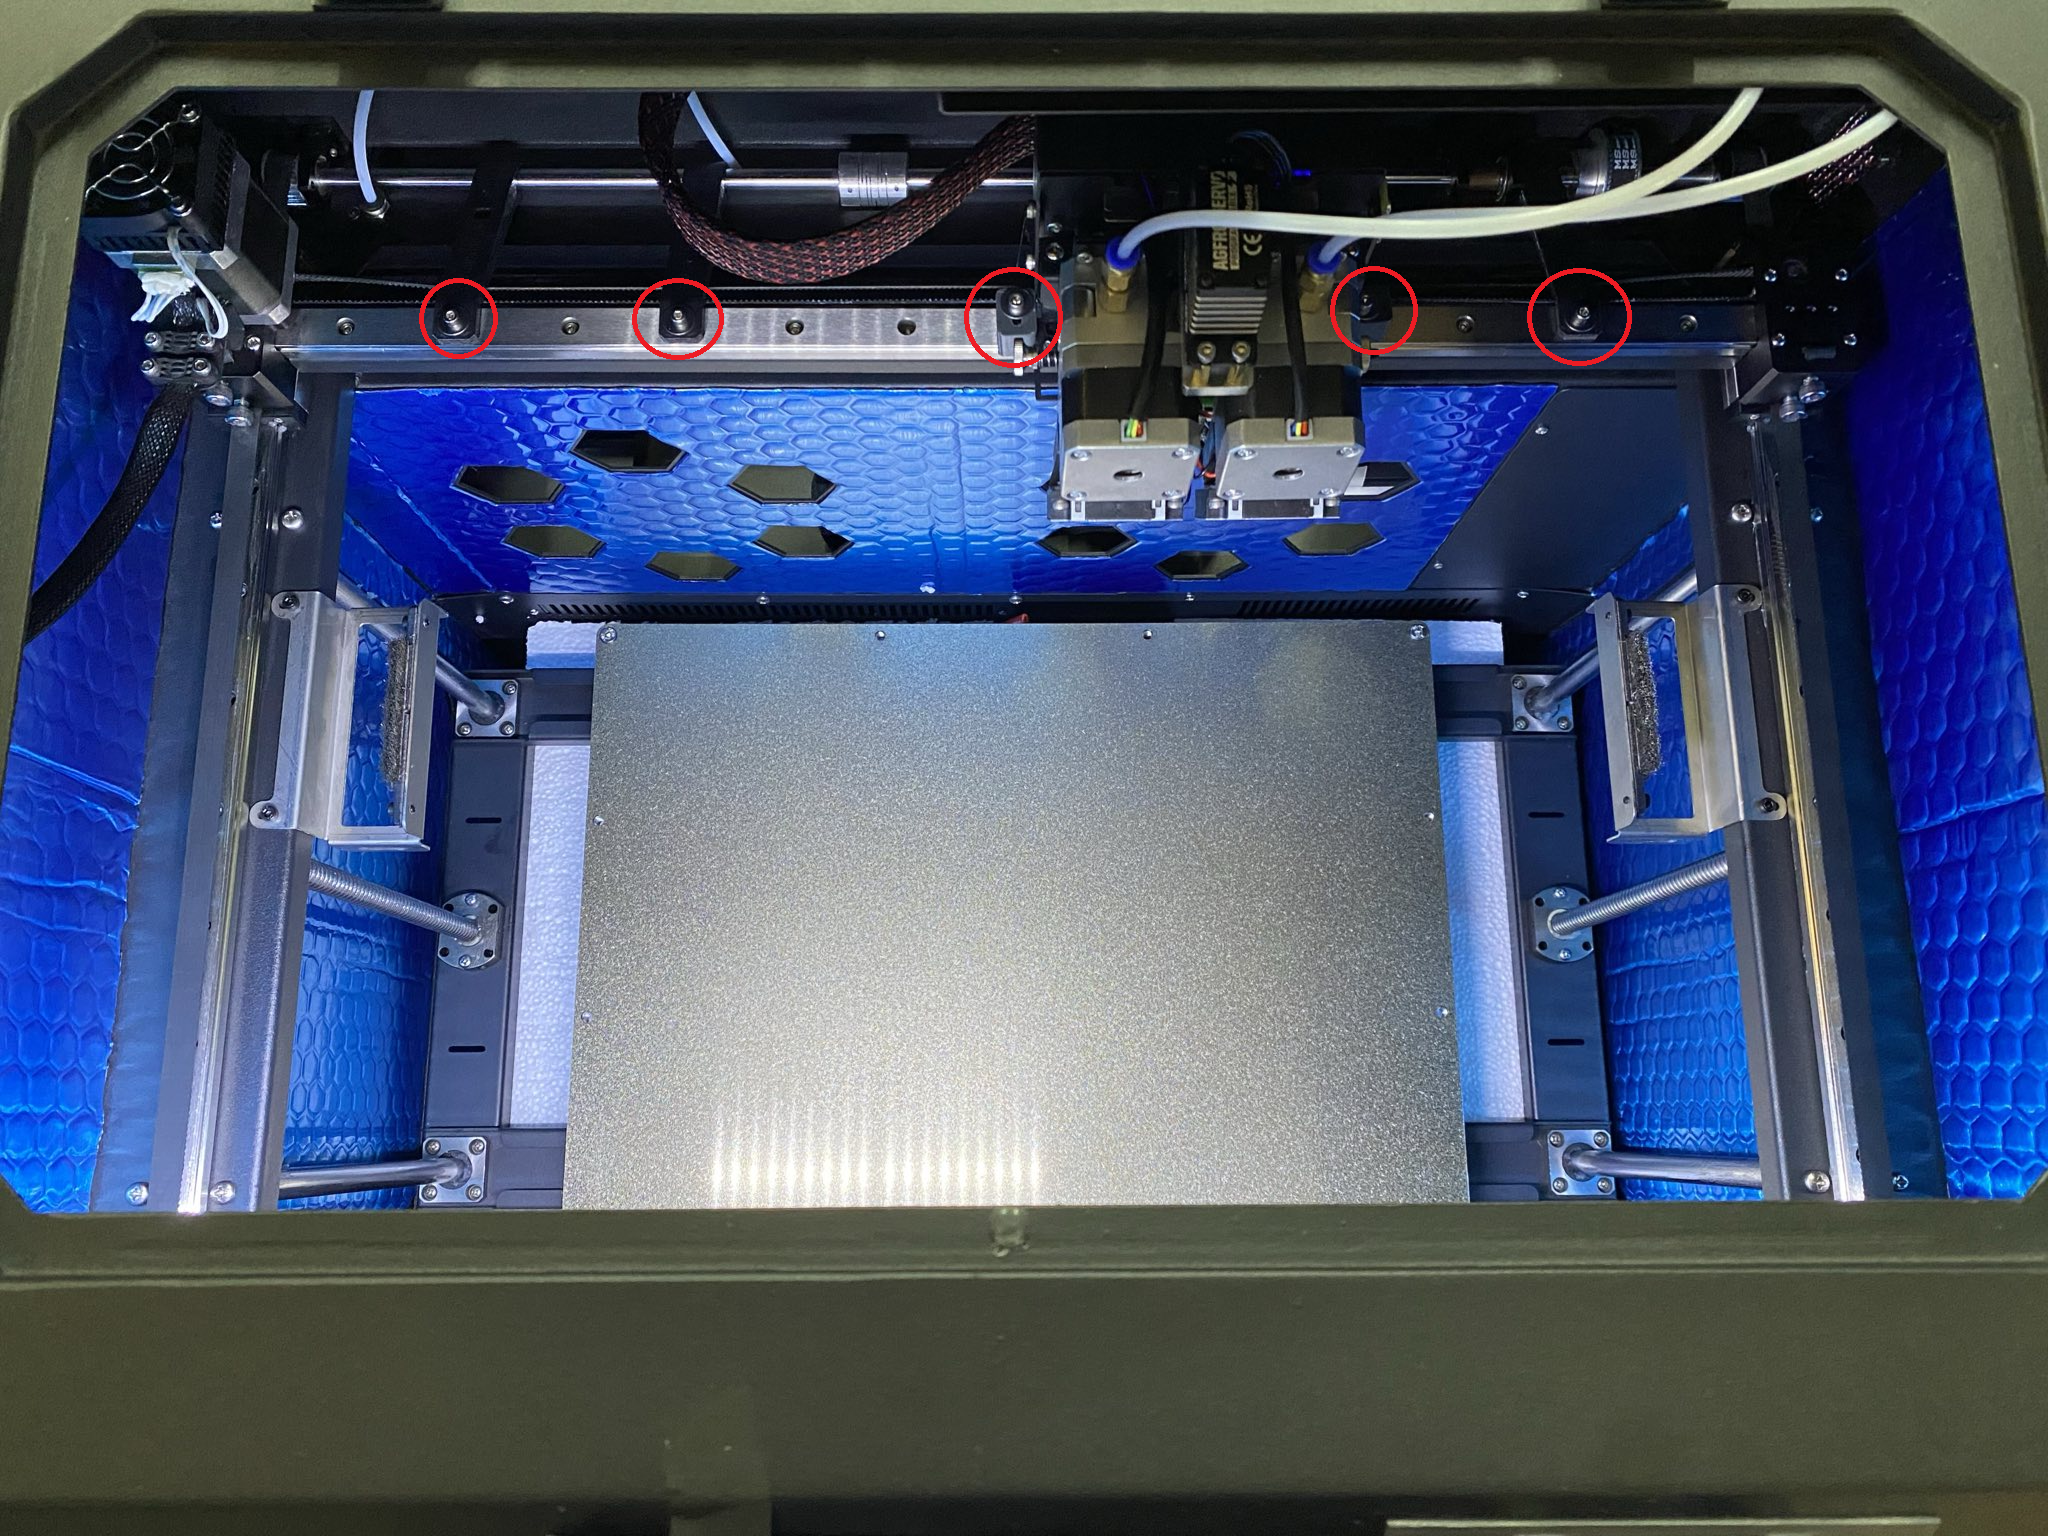
Important
Failure to remove the guard tabs could damage the printer. These are installed to prevent movement of the gantry during shipping.
3. Plug in the printer using the supplied power cord. (Usually located on top of the print bed, zip tied to the back panel).
Important
The circuit must be 20 Amp 110V. The supplied plug is a NEMA 6-20P and will only fit the aforementioned type of socket plug.
4. Turn on the printer.
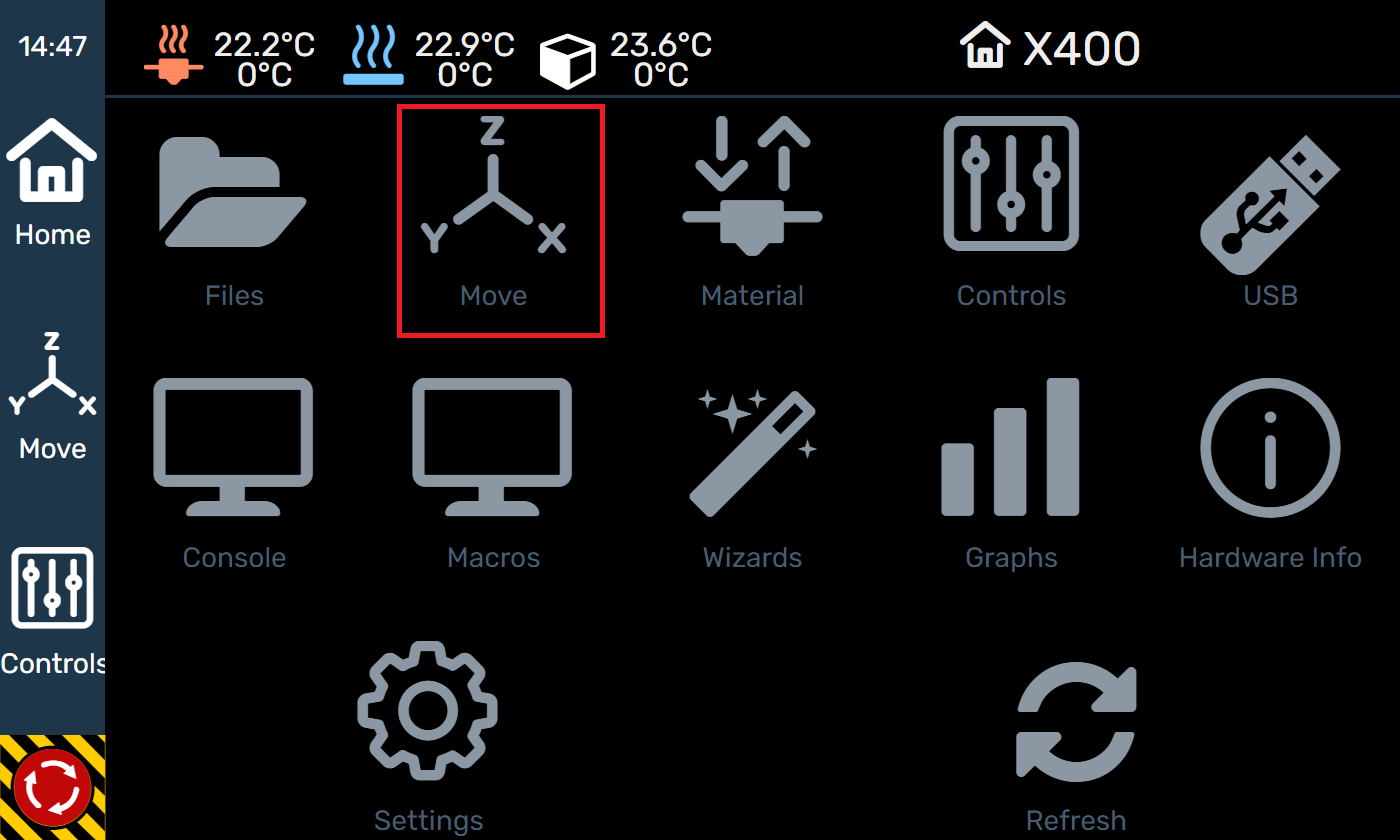
5. Press the Move button on the home screen.
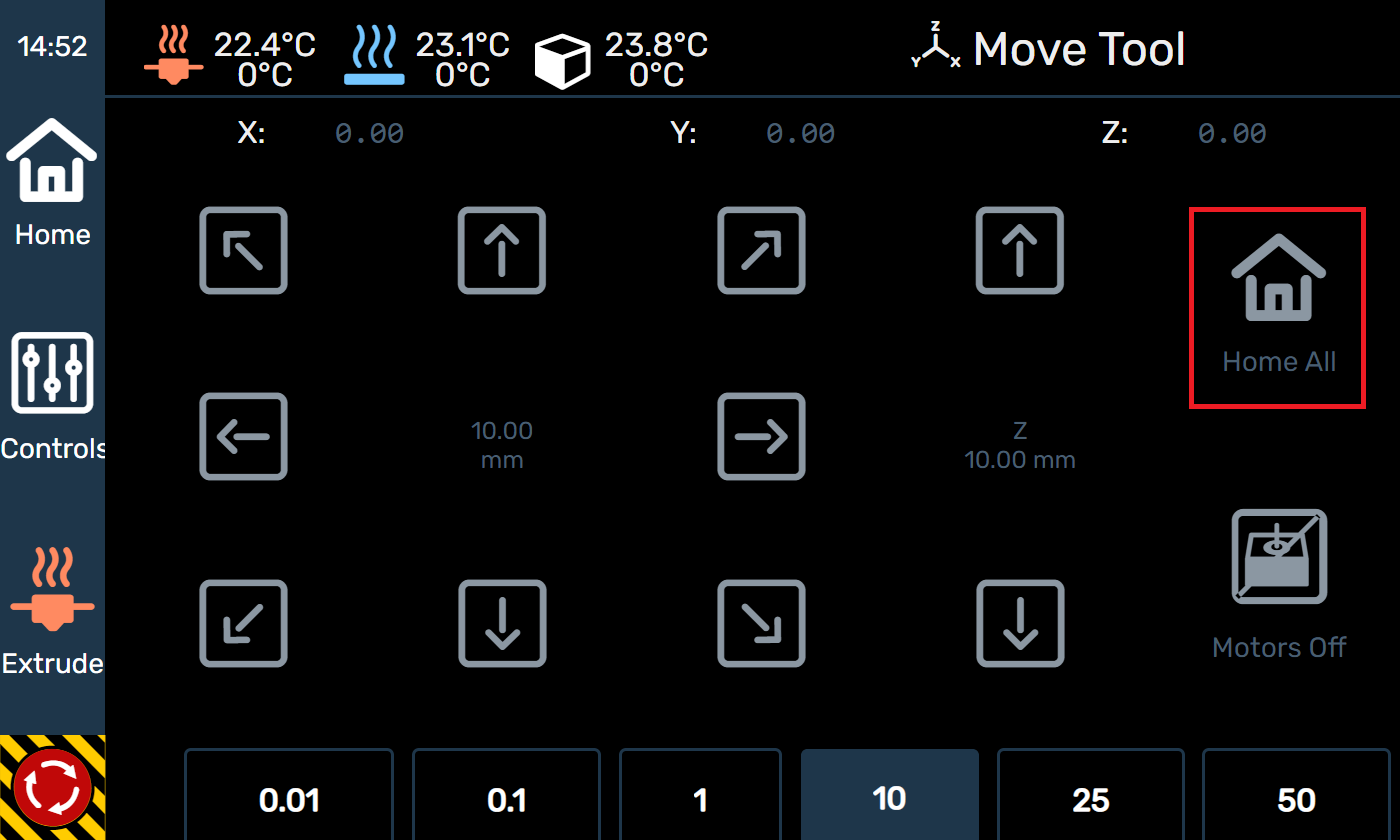
6. Press the Home All button. This will cause the system to home, and raise the bed so the contents underneath can be removed.
7. Remove filament, foam packaging, and tool bag from the printer's base. Clean any styrofoam debris (settled particles from shipping) with a shop-vac.
Remember to keep all of your packaging in case the machine needs to be shipped for repairs.
¶ Work surface install
¶ Tools required
- Work gloves
¶ Synopsis
¶ Requirements
- Make sure to place the printer on a very sturdy table or work surface to minimize vibrations during printing.
- The rear of the printer must be accessible to load and unload filament, and for safety reasons.
- We recommend at least 1 foot behind the printer from any wall.
- Work surface must be a minimum of 23” x 25”.
- The HTX is a heavy machine, so the work surface should be strong enough to accommodate a minimum of 150lbs.
¶ Instructions
- Make sure the work area is clear of any objects or debris.
- Both individuals must put on a pair of work gloves.
- Enlist the help of a second person to lift the printer onto the work table or surface.
Important
2 people are required to lift the HTX. Do not attempt to move it by yourself!
- Using the handles on the sides of the printer, gently lift and set the printer on the work surface.
Important
Any bumps or shocks could throw off the leveling of the bed, gantry, or other parts in the machine, so lift and set it down carefully.
-
Plug the power cable into the printer.
-
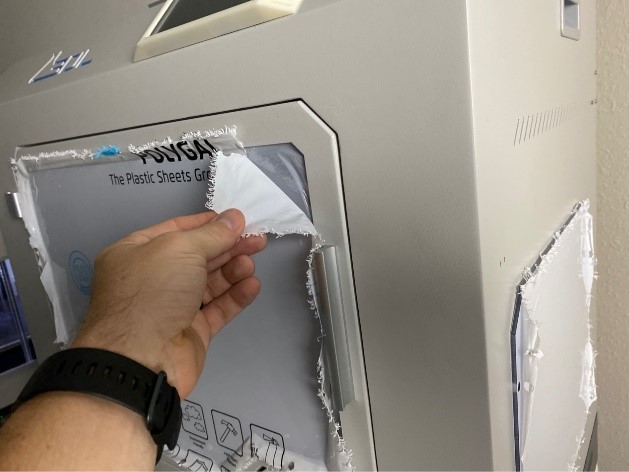
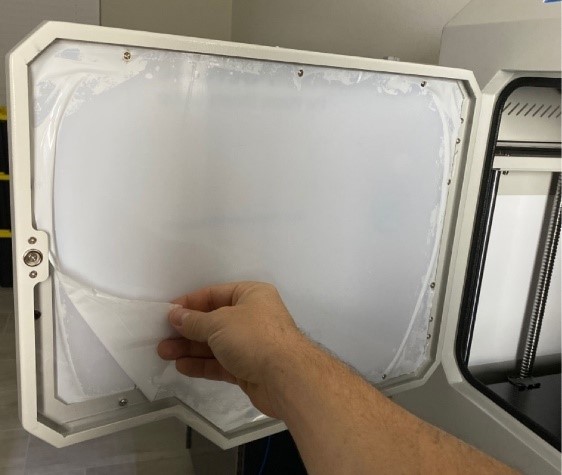
Remove the plastic film protection from the top and front door panels.
-
Remove the plastic film protection from the touch screen.
¶ Setting up the printer networking
¶ Tools required
- None
¶ Synopsis
In order to use the more advanced capabilities of the printer and manage the printer from 3D Labs Studio, it's necessary to connect it to a network.
From there you'll be able to access the advanced web interface and monitor prints from another device, such as a workstation or tablet.
The printer will also gain access to firmware updates from 3D Labs directly, ensuring the latest functionality and fixes are always up-to-date on your machine.
¶ Instructions
-
Connect the ethernet cable to the network port.
If you require WiFi, you can purchase a wifi adapter from 3D Labs to connect it to your wireless network.
Tip
WiFi is not supplied by default due to ITAR and other industry security regulations, and security requirements of most businesses.
-
Obtain the IP address of the machine:
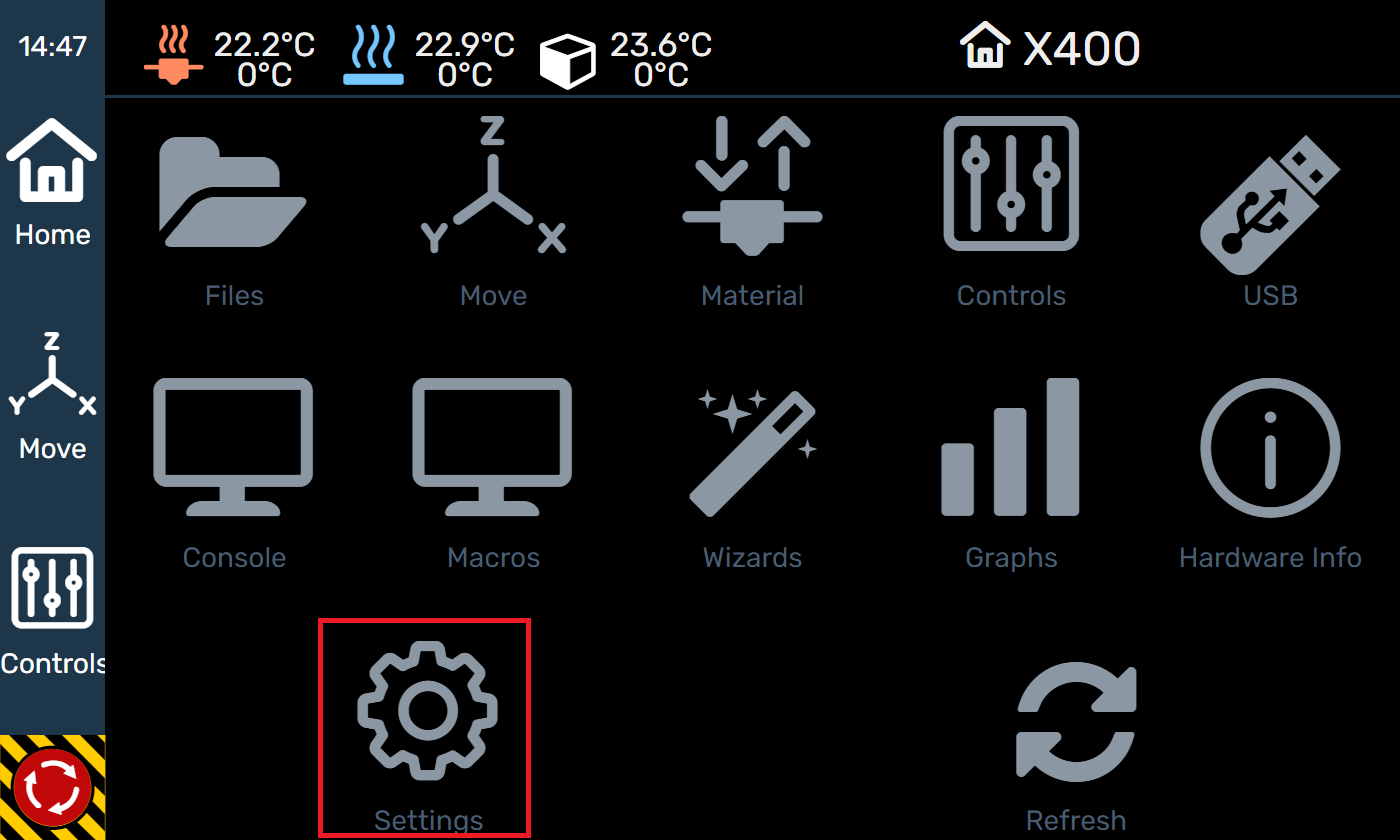
a. Tap Settings on the touchscreen.
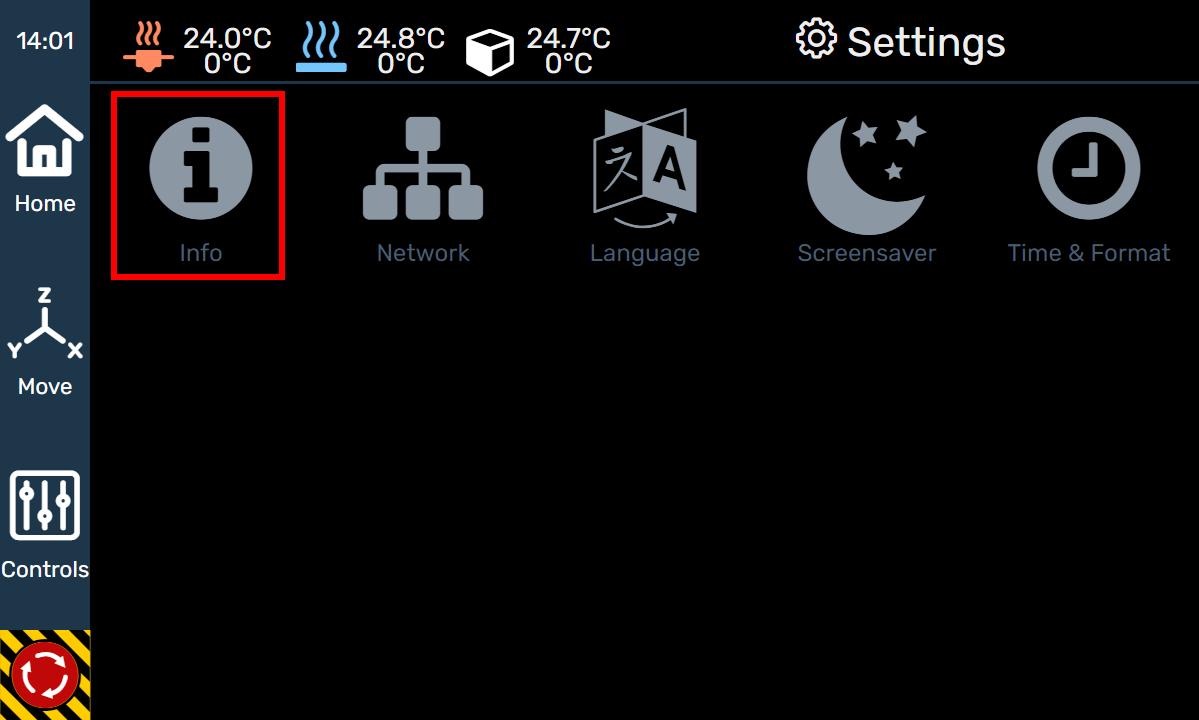
b. Tap Info on the touchscreen.
-
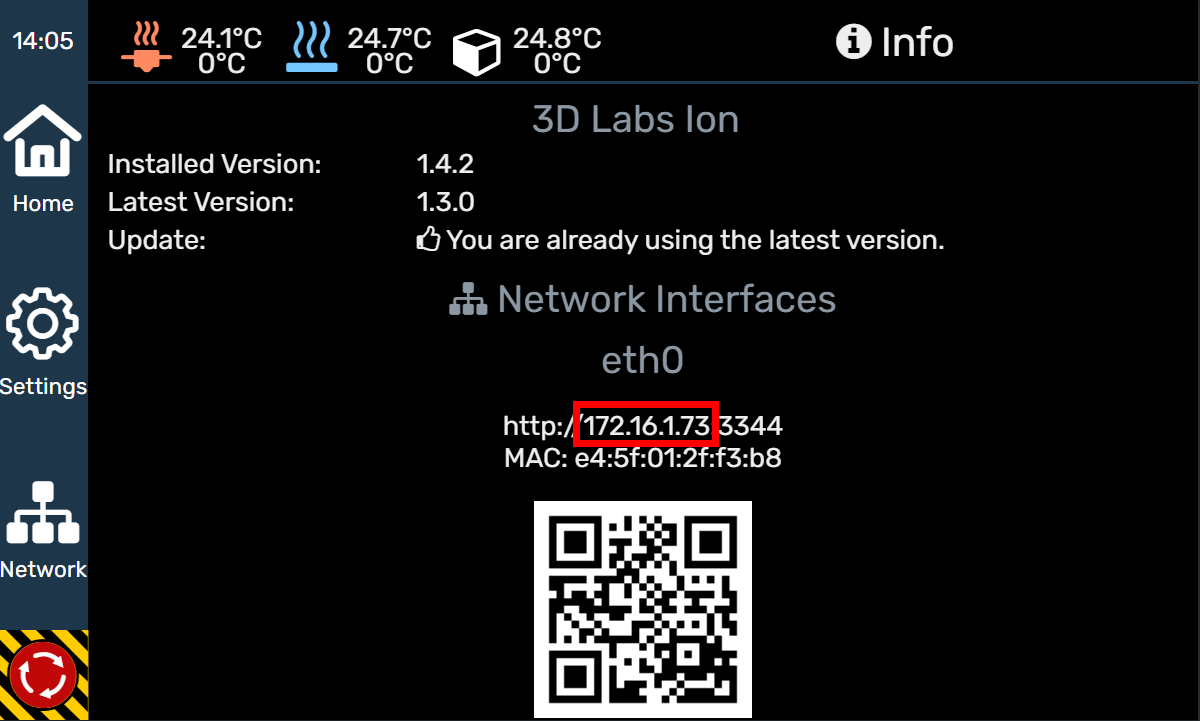
Note the IP address shown on the screen.
-
Enter the IP Address into the address bar of your browser. Do not enter the trailing port number, only the IP address is required.
Tip
If you require a valid SSL certificate, please contact support@3dlabs.io.
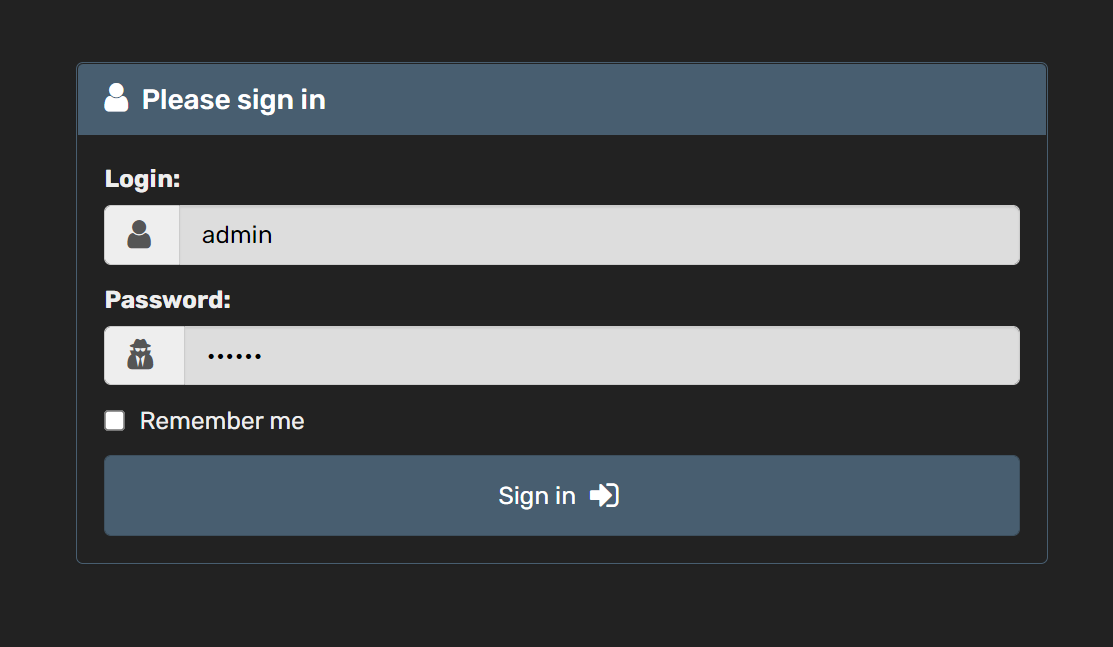
- The default login information is:
Username: admin
Password: 3dlabs
Important
Change the password immediately after logging in to the printer.
¶ Loading filament into the printer
¶ Tools required
- Safety glasses
- Flush cutters
- Work gloves
¶ Synopsis
This section of the guide will demonstrate how to load printing filament into the HTX.
¶ Instructions
-
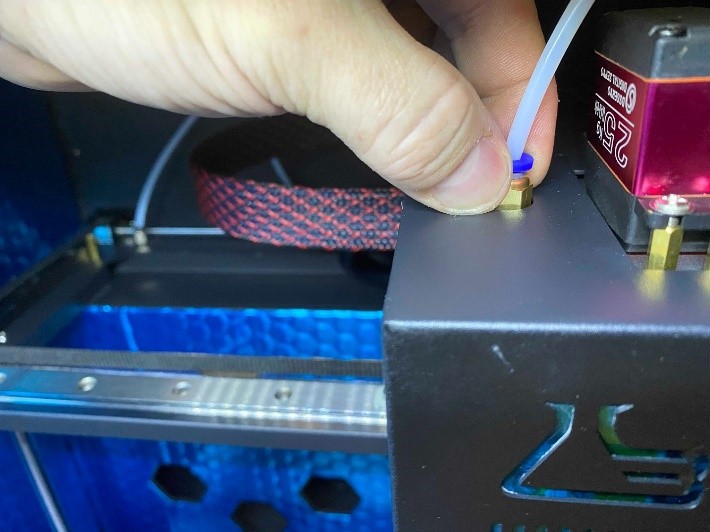
Unscrew the ptfe tube coupling on top of the extruder head you intend to use.
-
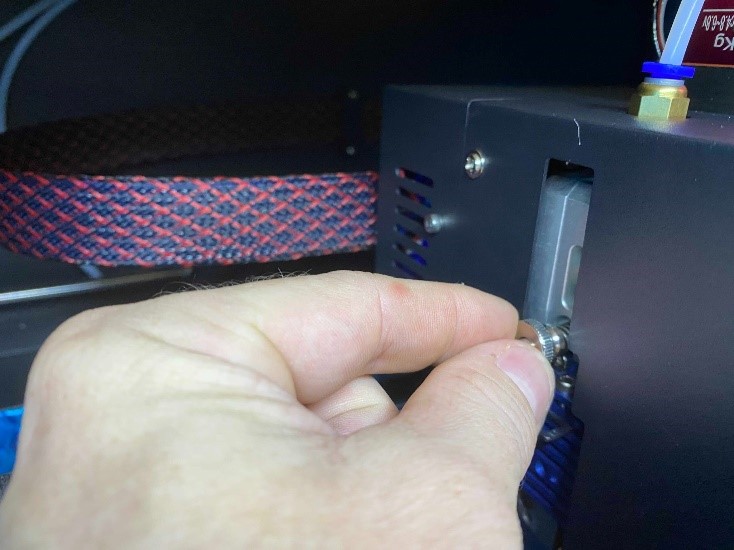
Unscrew the tension nut so that the spring is fairly loose.
Important
Do not loosen it so much that the nut comes off of the screw.
-
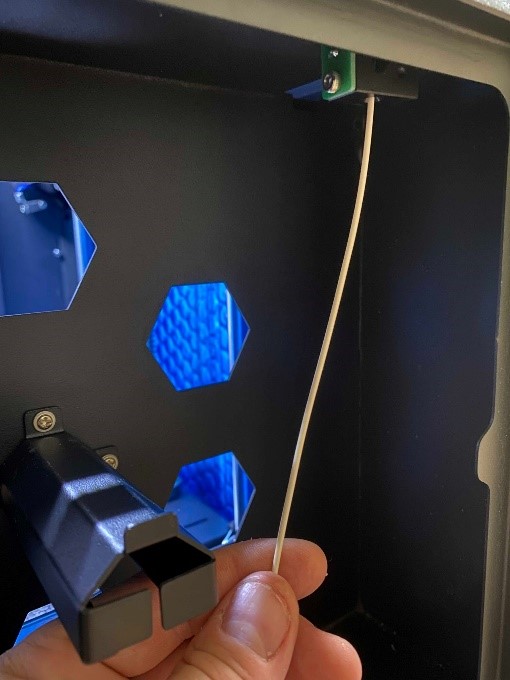
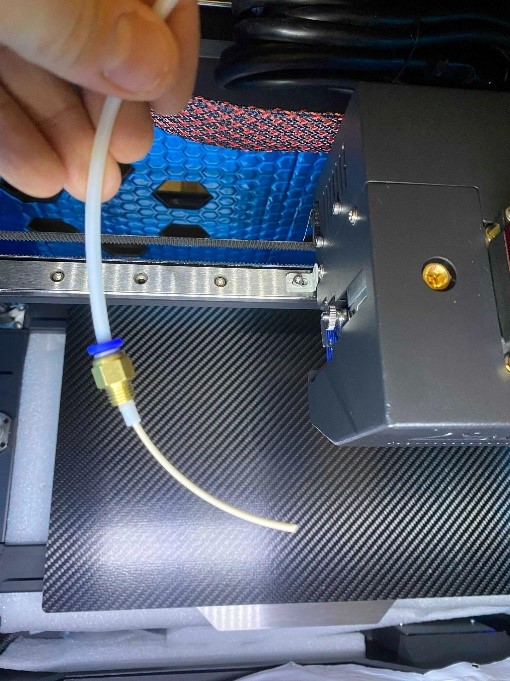
Open the rear door of the printer and feed the material through the tube until about 2" of filament comes out of the other end inside the printer.
-
Carefully hang the spool onto the mount and close the door.
Tip
Often times Carbon Fiber blended filaments can be very springy and are wound very tight. If you have trouble hanging the spool onto the roller mount without filament springing off the roll, it helps to despool some of the material before loading it into the machine.
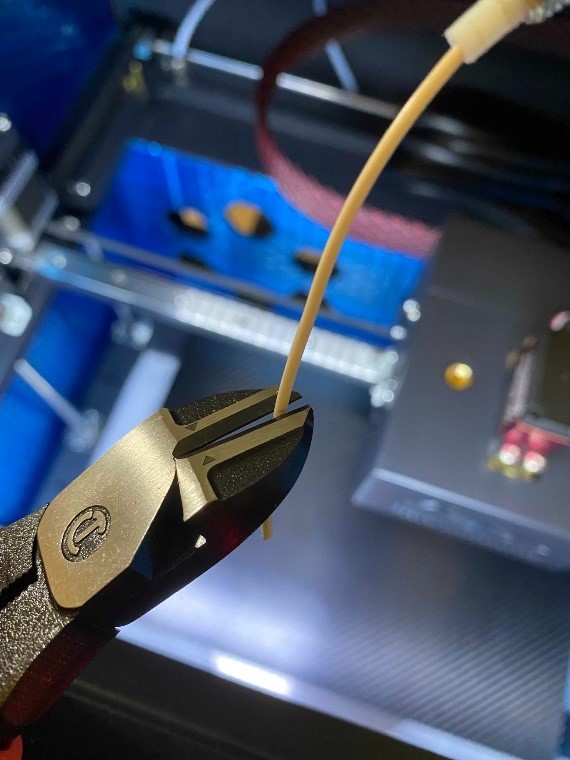
- Cut the tip of the filament at a 45-degree angle with flush cutters and insert it into the hole on top of the extruder head where you removed the coupling.
Tip
Cutting the filament at an angle allows it to mesh with the gear easier when inserting it.
-
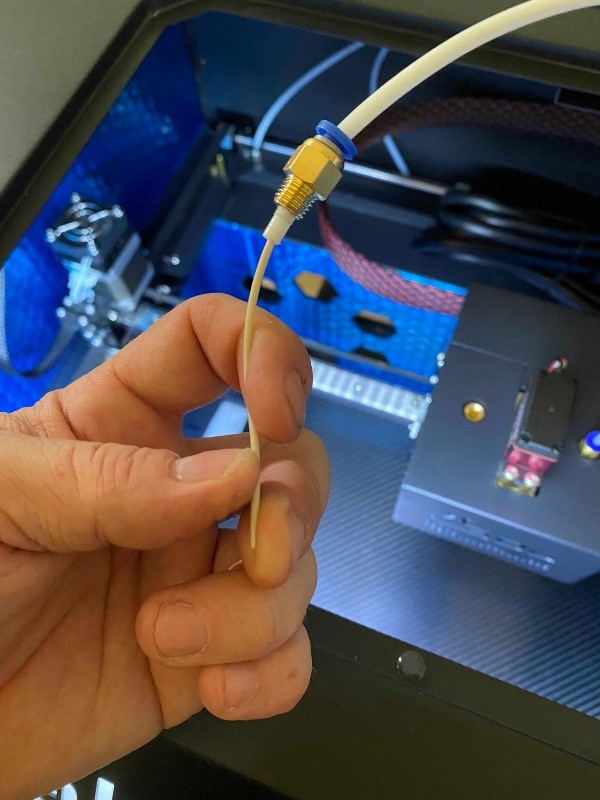
Straighten the filament with your finger. This makes insertion into the feeder hole easier. Insert it into the hole on top of the extruder head where you removed the coupling.
-
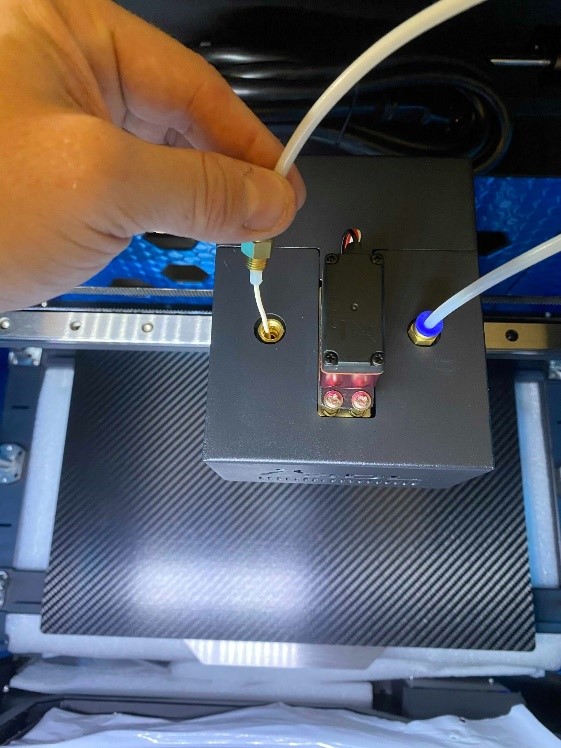
Press down firmly on the filament and insert it about 1” (you may have to press it in a couple of times) into the hole.
-
Re-tighten the tension screw on the left a fair amount so that the spring is semi-tight. Tug on the filament lightly and you should feel some resistance. This is normal, it means that the extruder is gripping the filament, which is what we want.

Tip
The tension screw does not have to be super tight. Typically, a 1/8-inch (3mm) gap, or finger tight is a good place.
-
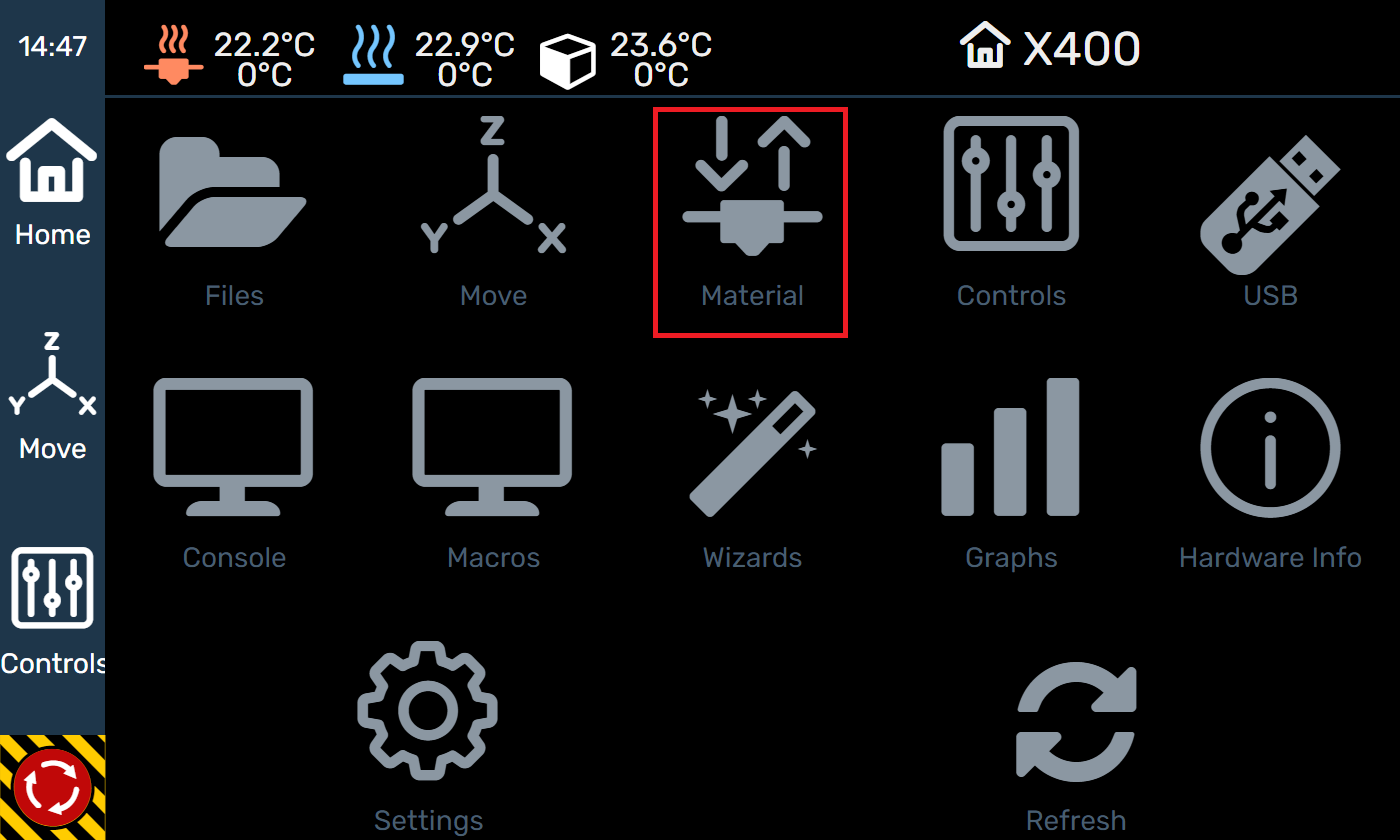
Tap the Material button on the touchscreen.
-
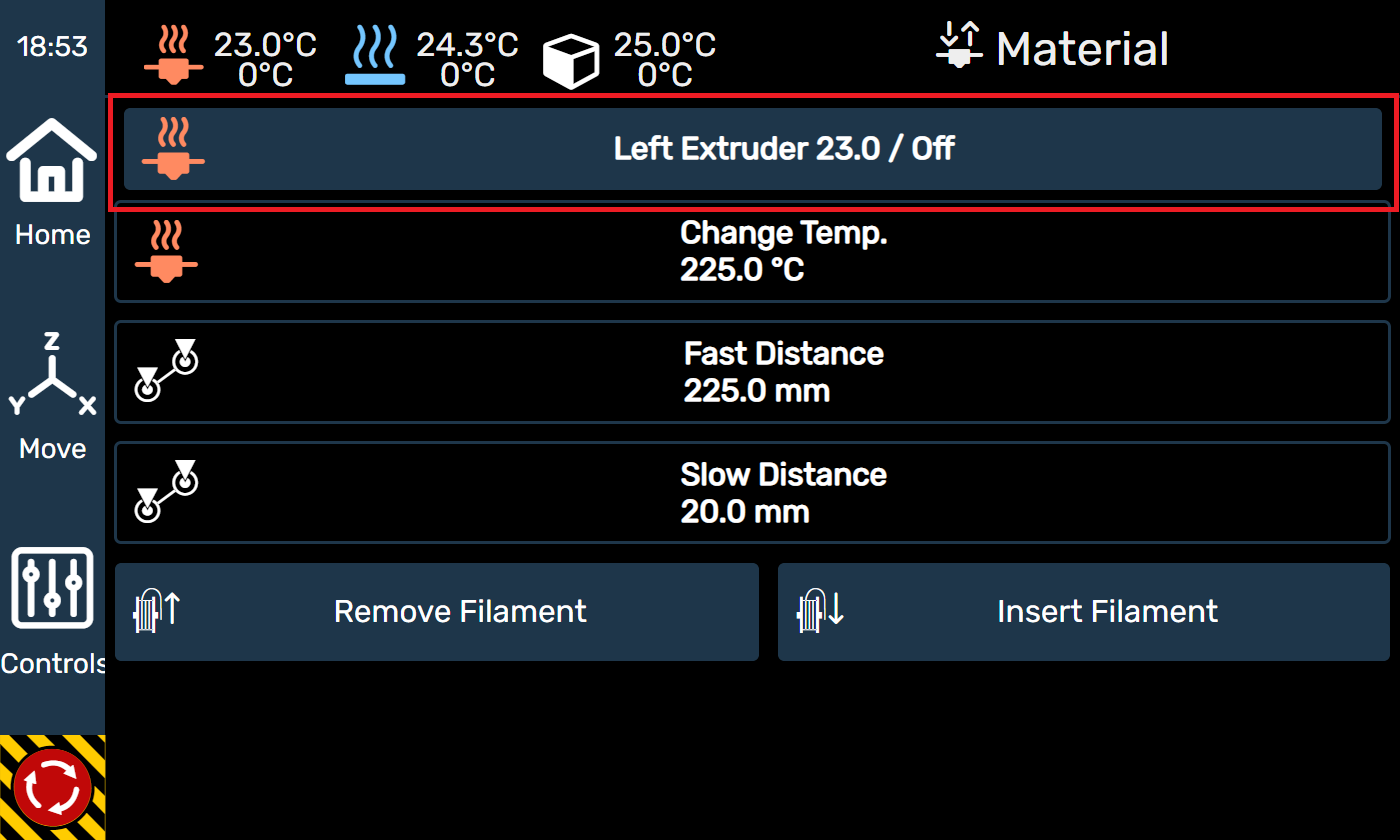
Tap the Extruder button.
-
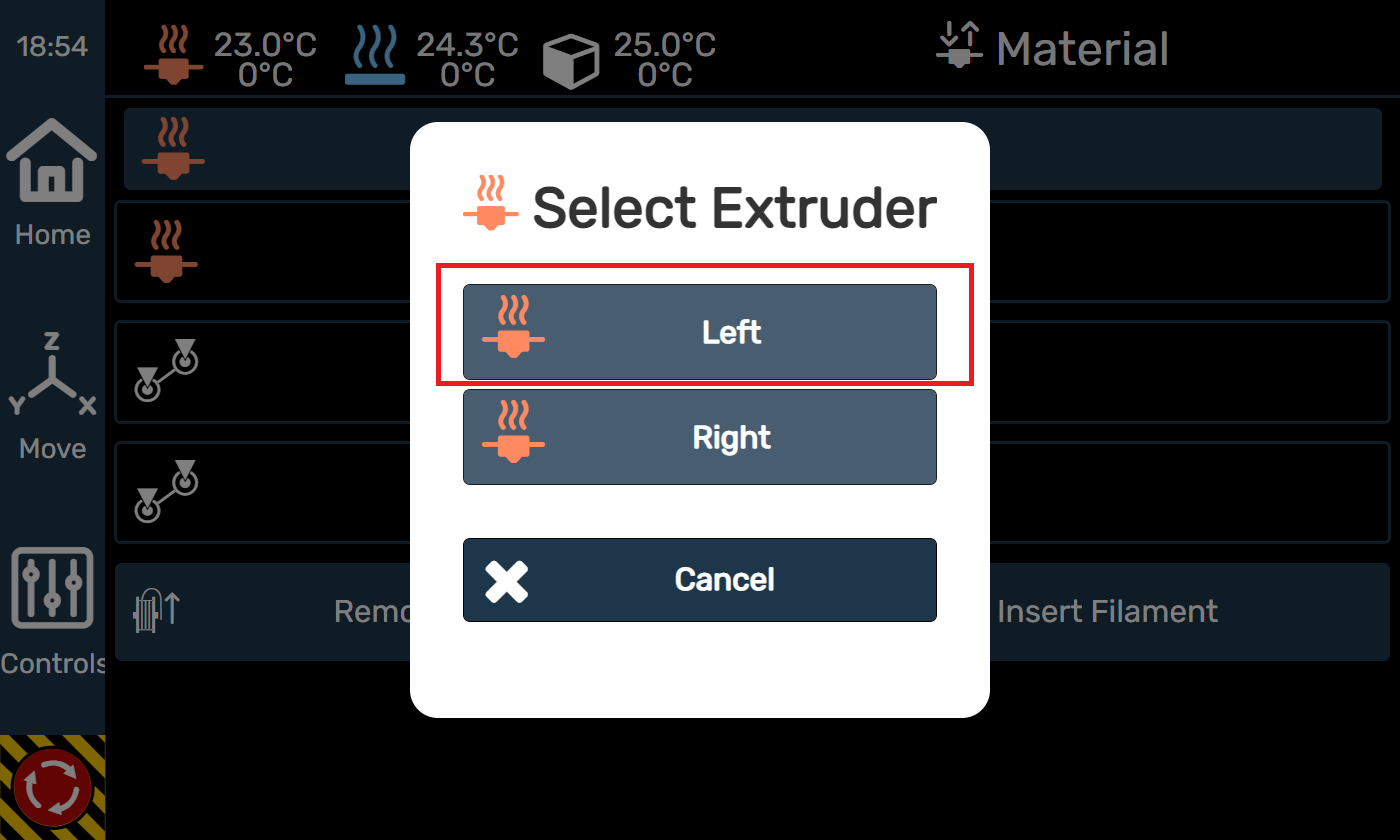
In our case we’ll be loading ABS or ASA that came with the printer, so choose Extruder 1 or Left.
-
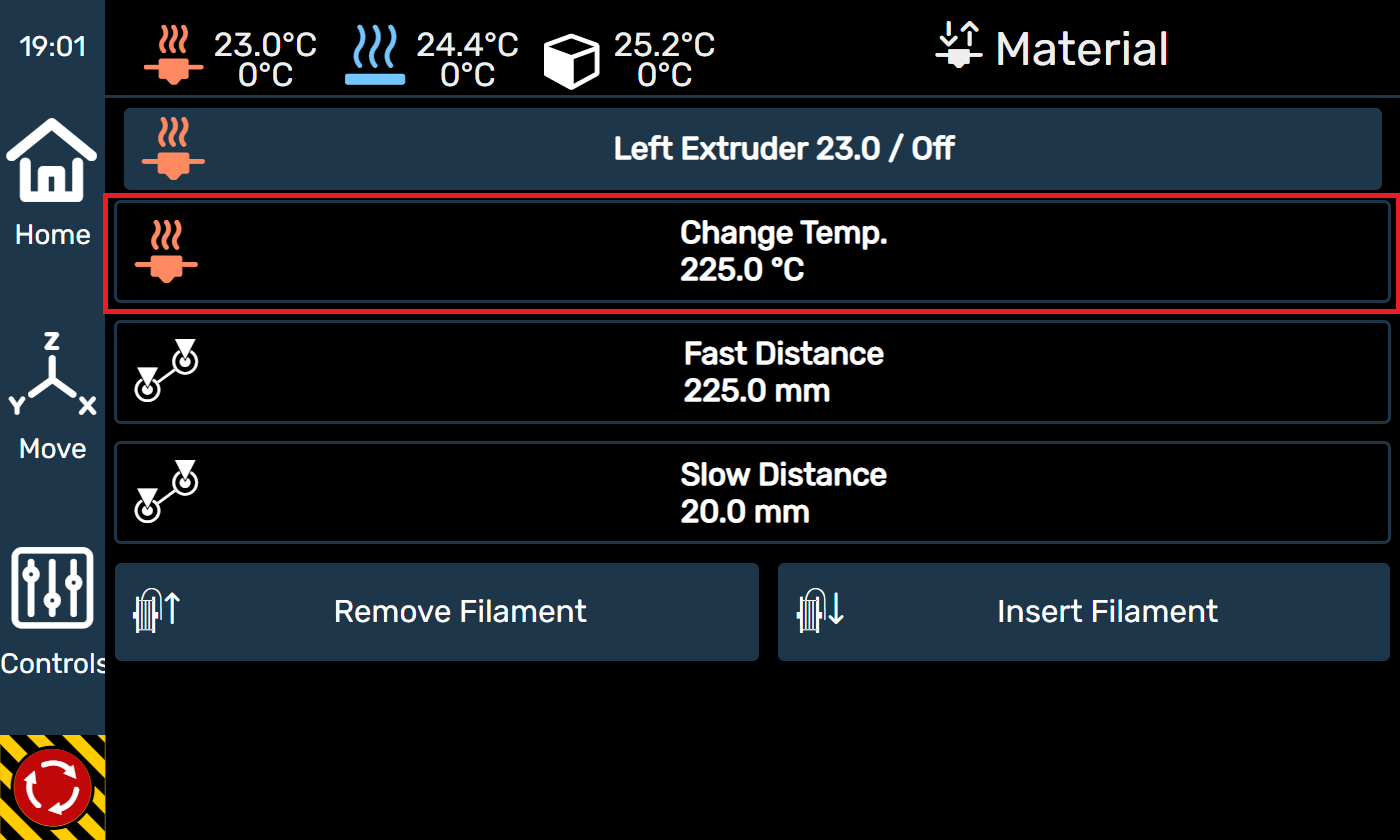
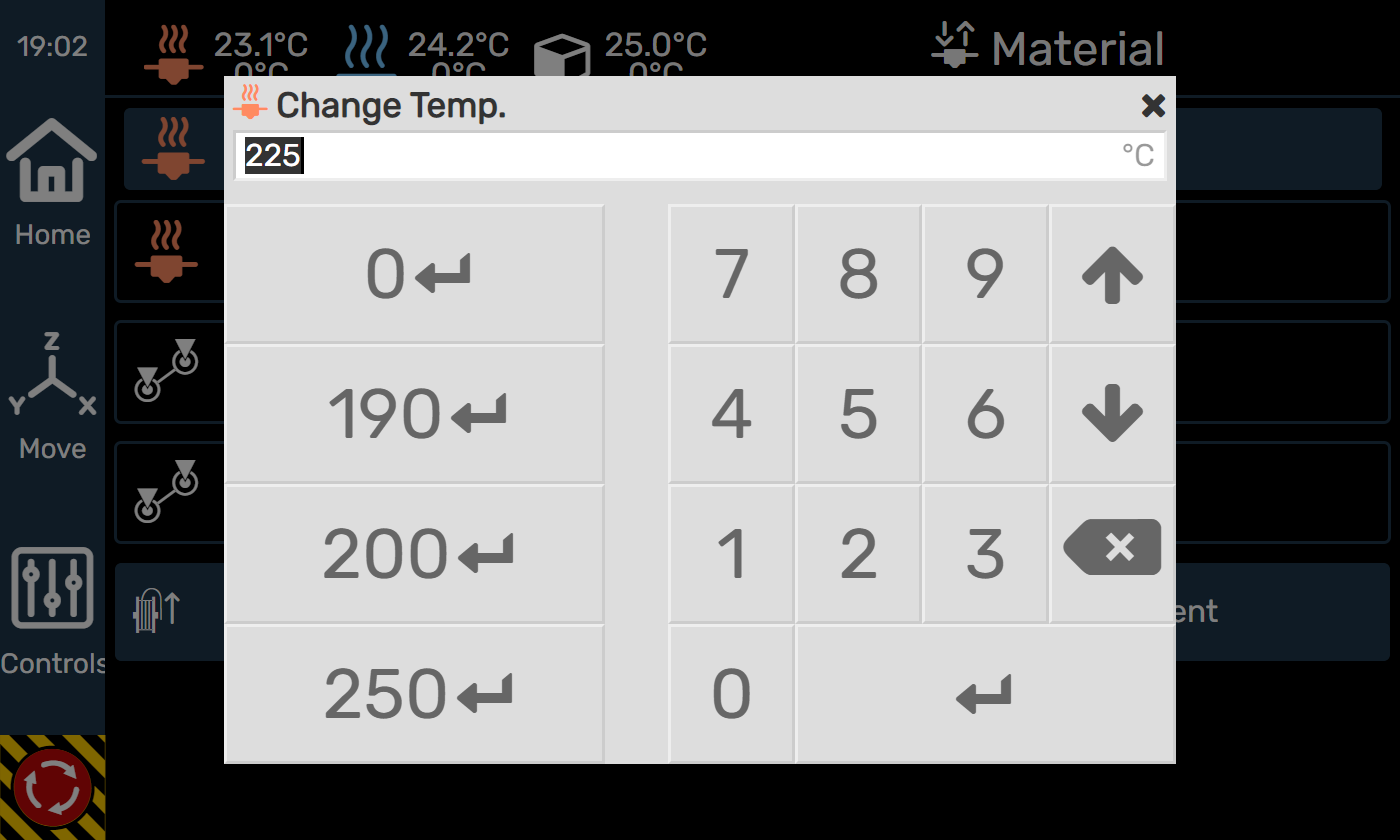
Set the temperature to 225C to use the ABS or ASA that you received with the printer.
-
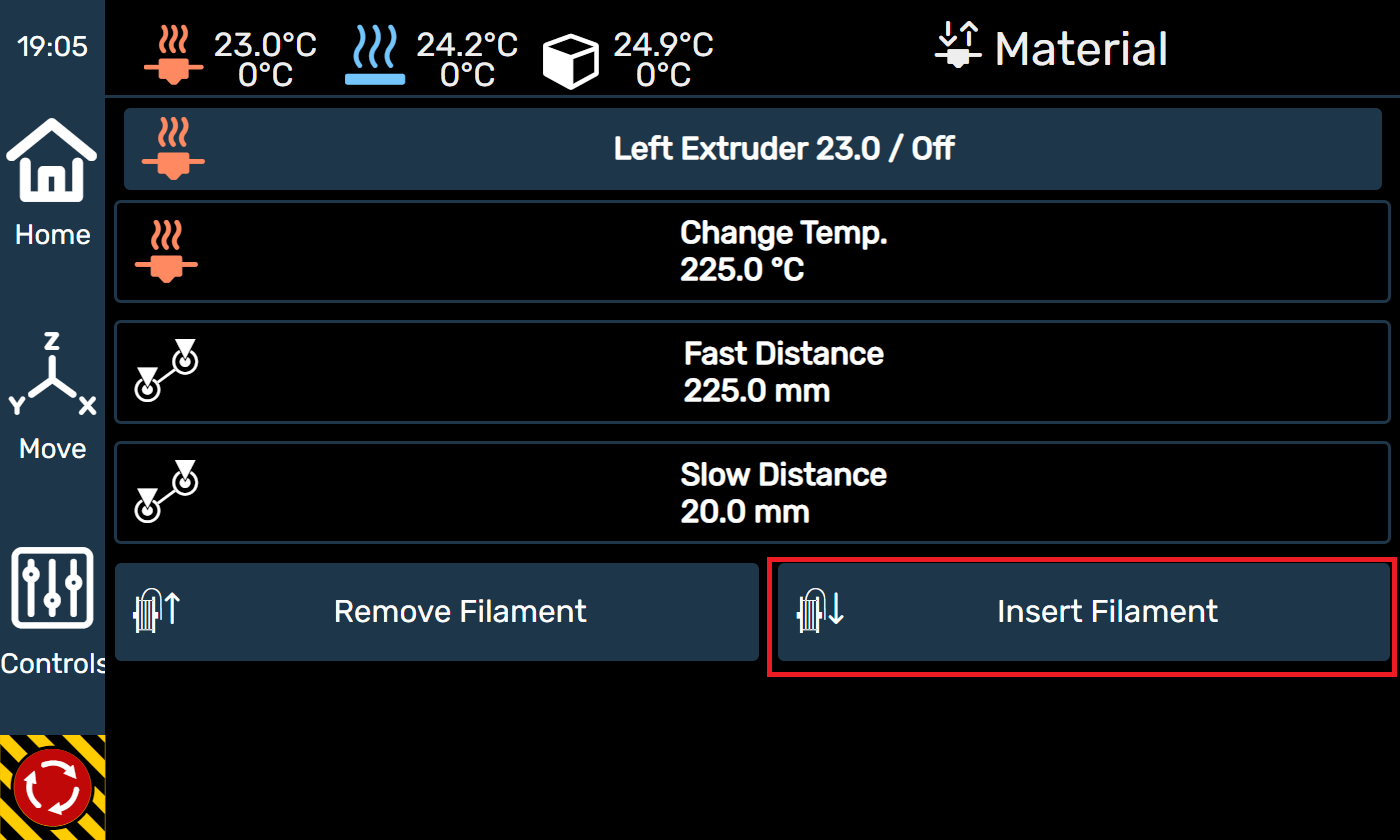
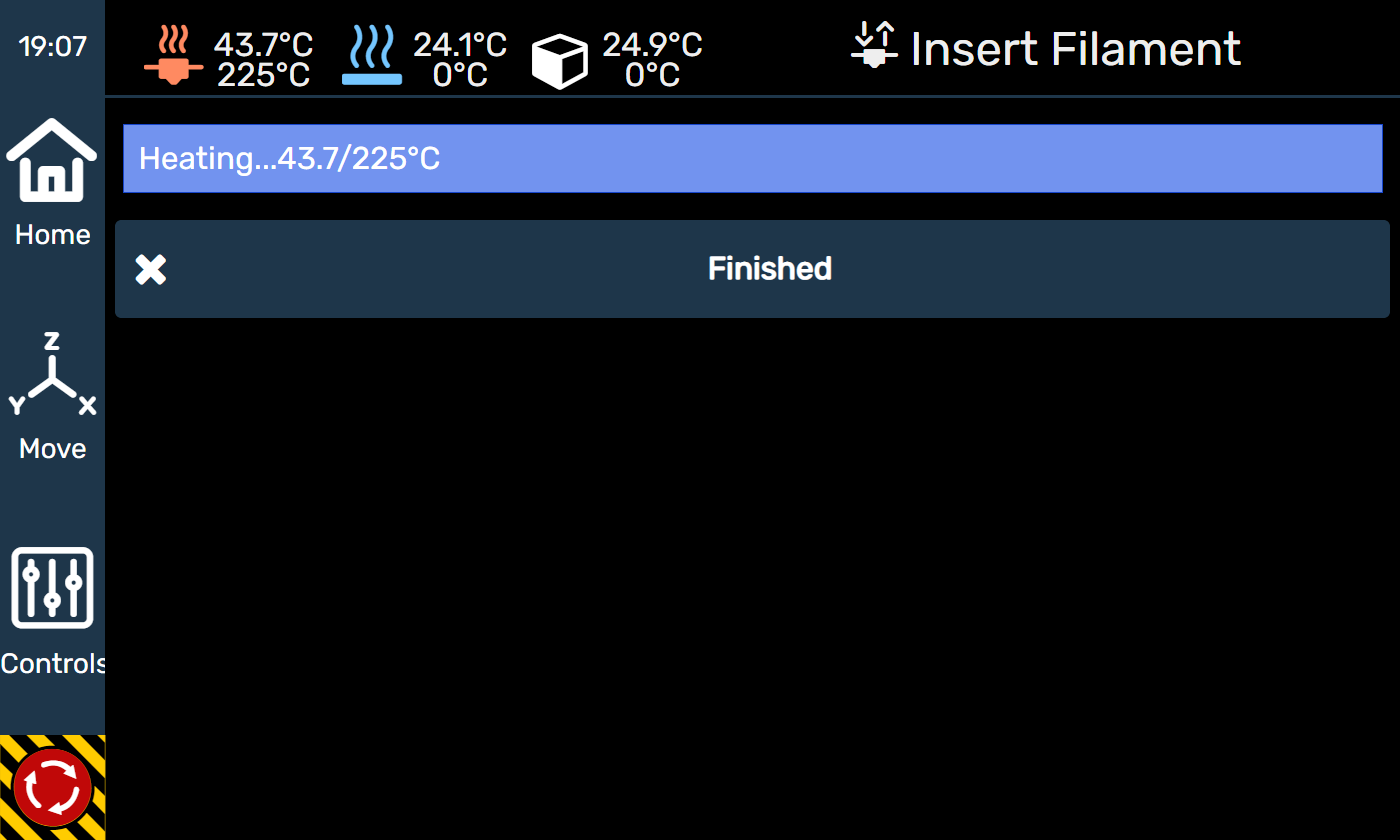
Tap the Insert Filament button and wait for the nozzle to heat up.
-
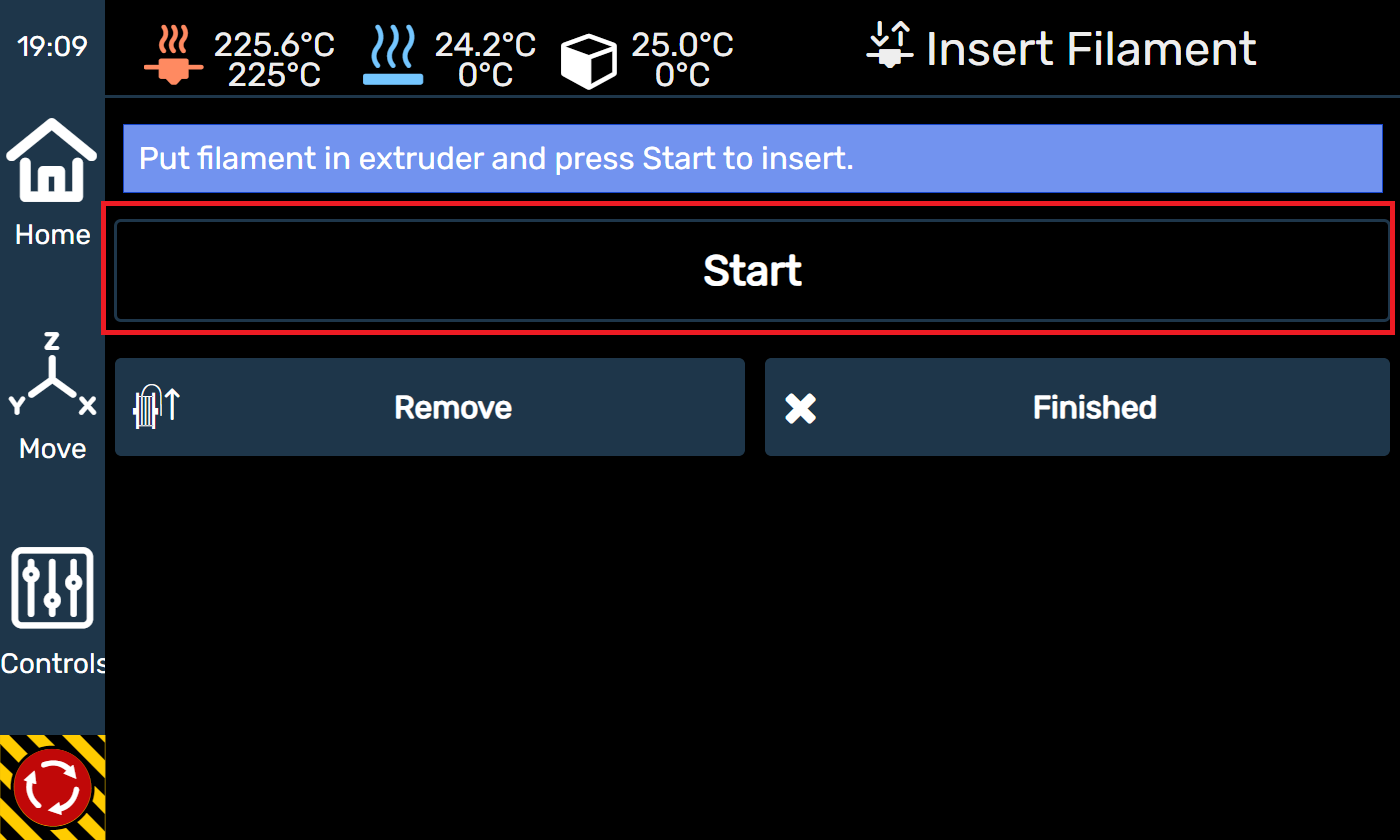
Once heated, the Start button will appear. Press it and the filament will begin loading.
-
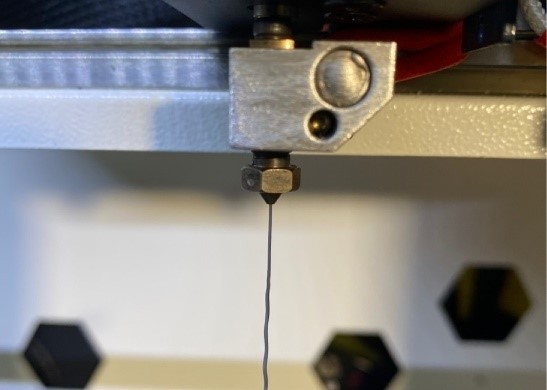
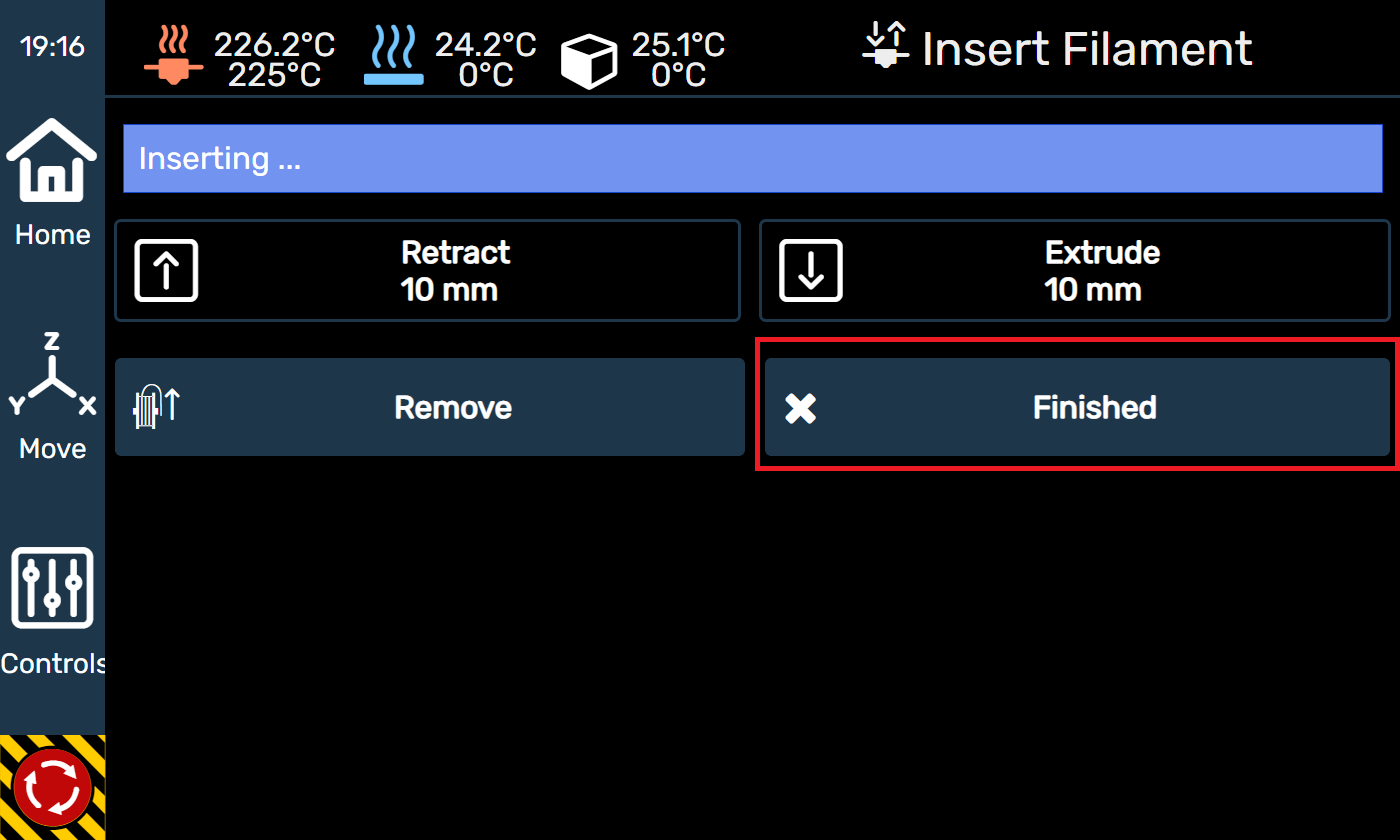
Once you see the filament come out, that means the material has been successfully loaded. Press the Finished button.
Tip
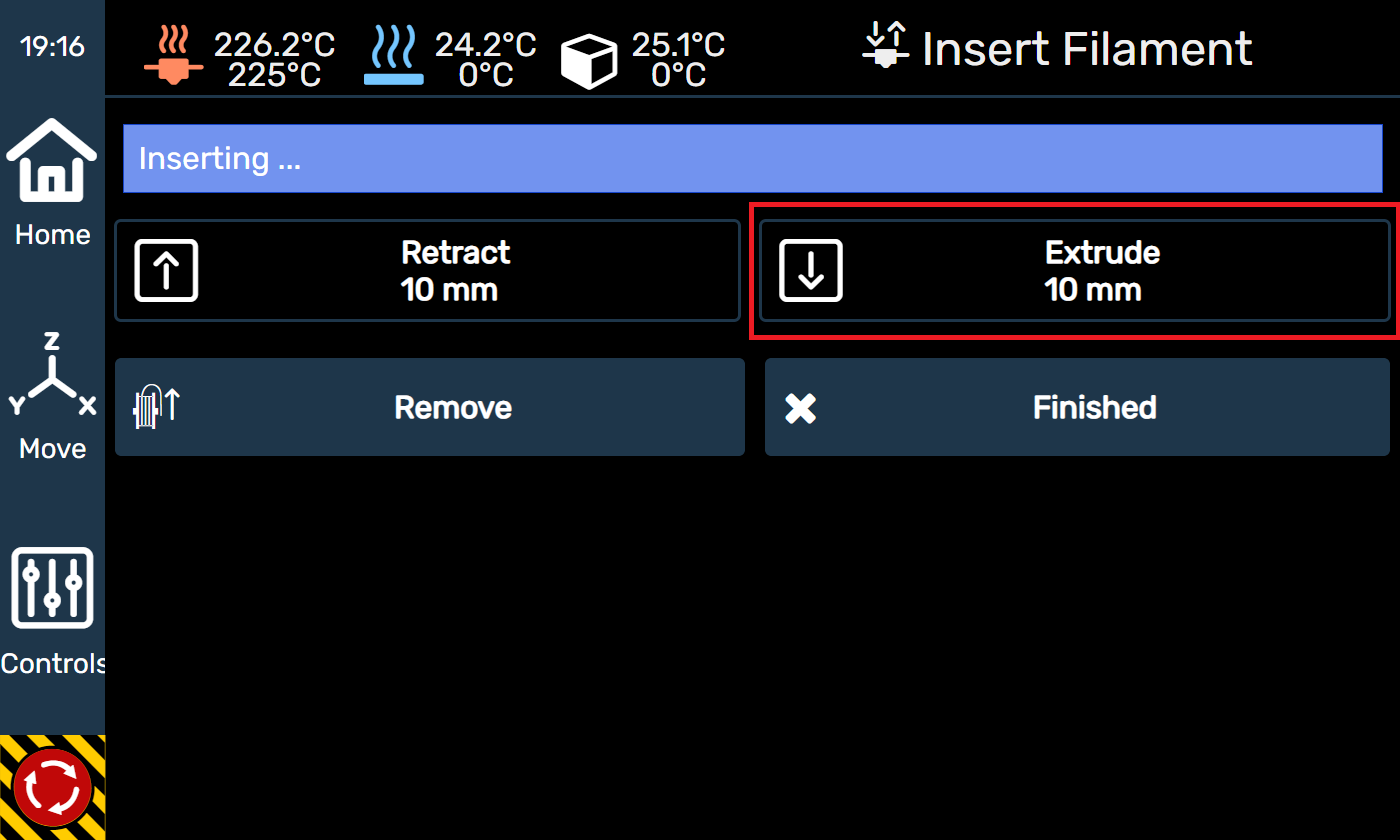
If you don’t see any filament come out, press the Extrude button twice.
Tip
If you still don’t see any coming out, try tightening the tension adjuster a little bit tighter, and it should begin feeding.
¶ First 3D print
¶ Synopsis
Now that the printer has been setup in the previous steps, it's time for you to kick off your first test print.
We recommend using the file called First print, as it prints within an hour.
¶ Instructions
- Use the HyperLok™ bed adhesive in your kit to apply a liberal amount of glue the center of the print bed. Try to evenly cover an area of about 6” x 6” using the provided silicone brush.
Tip
1 good layer of glue is all that is needed. Do not apply more.
-
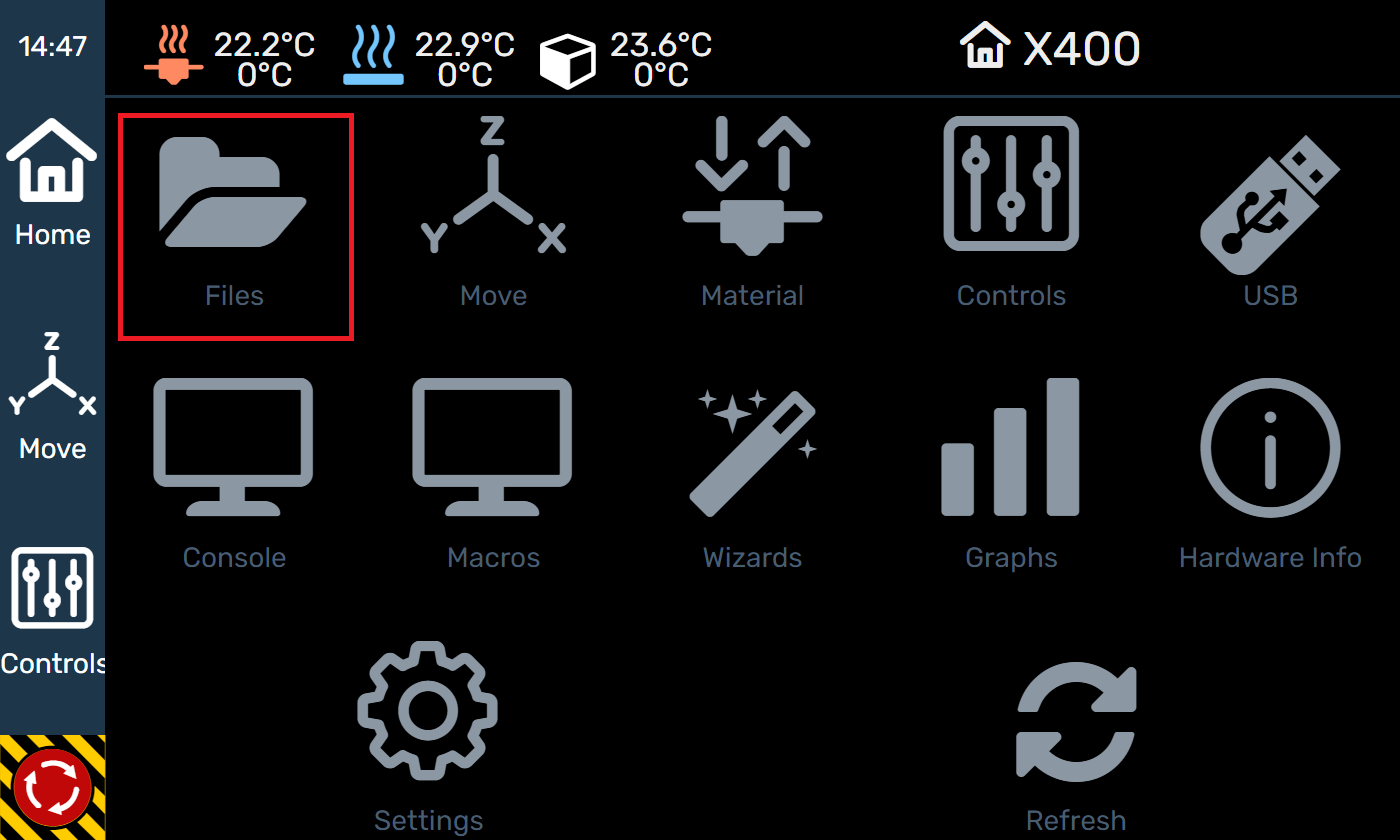
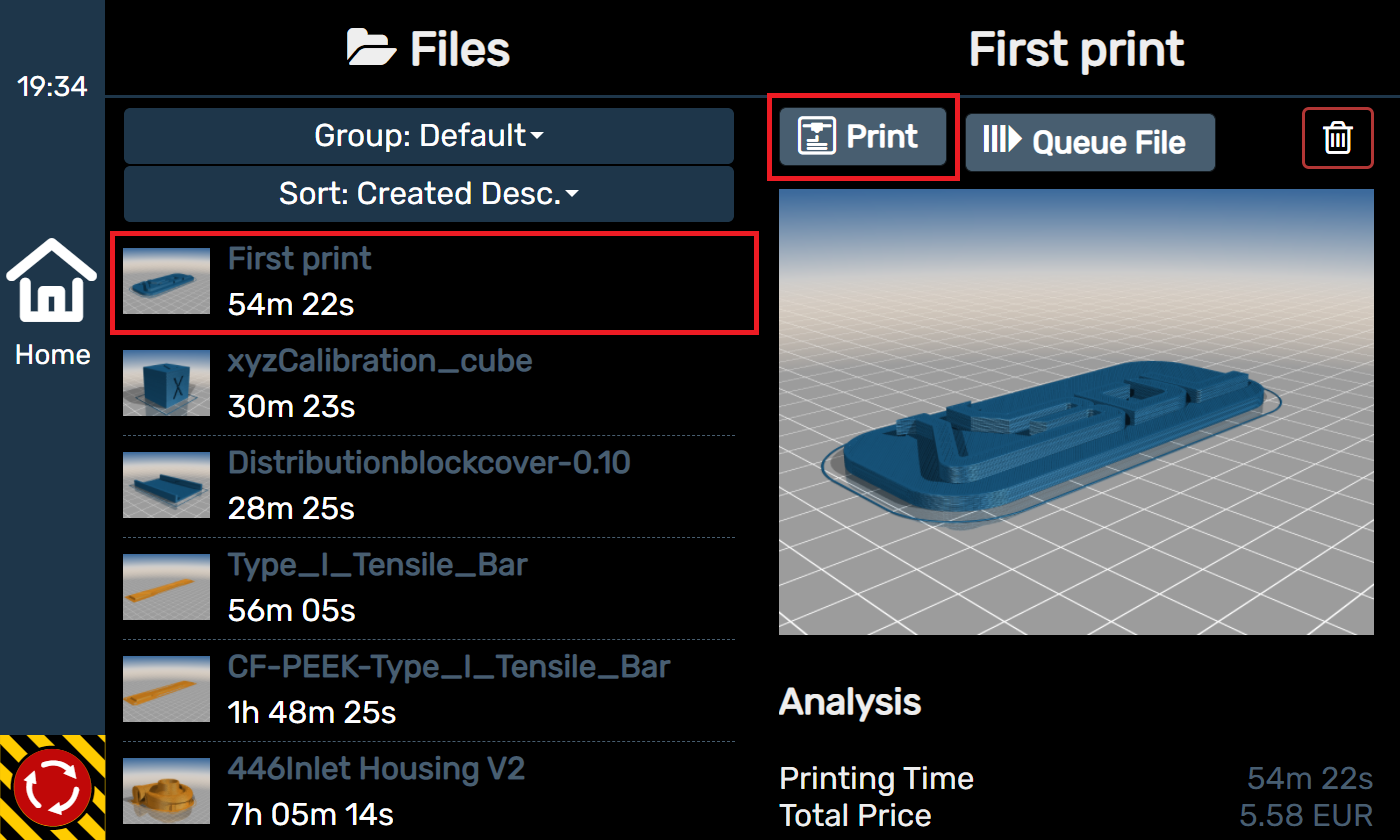
Press the Files button.
-
Select the First Print file and click Print
Tip
These files are sliced for ABS/ASA material. Do not attempt to print them with your own PLA material. Only use the material that came with the printer.
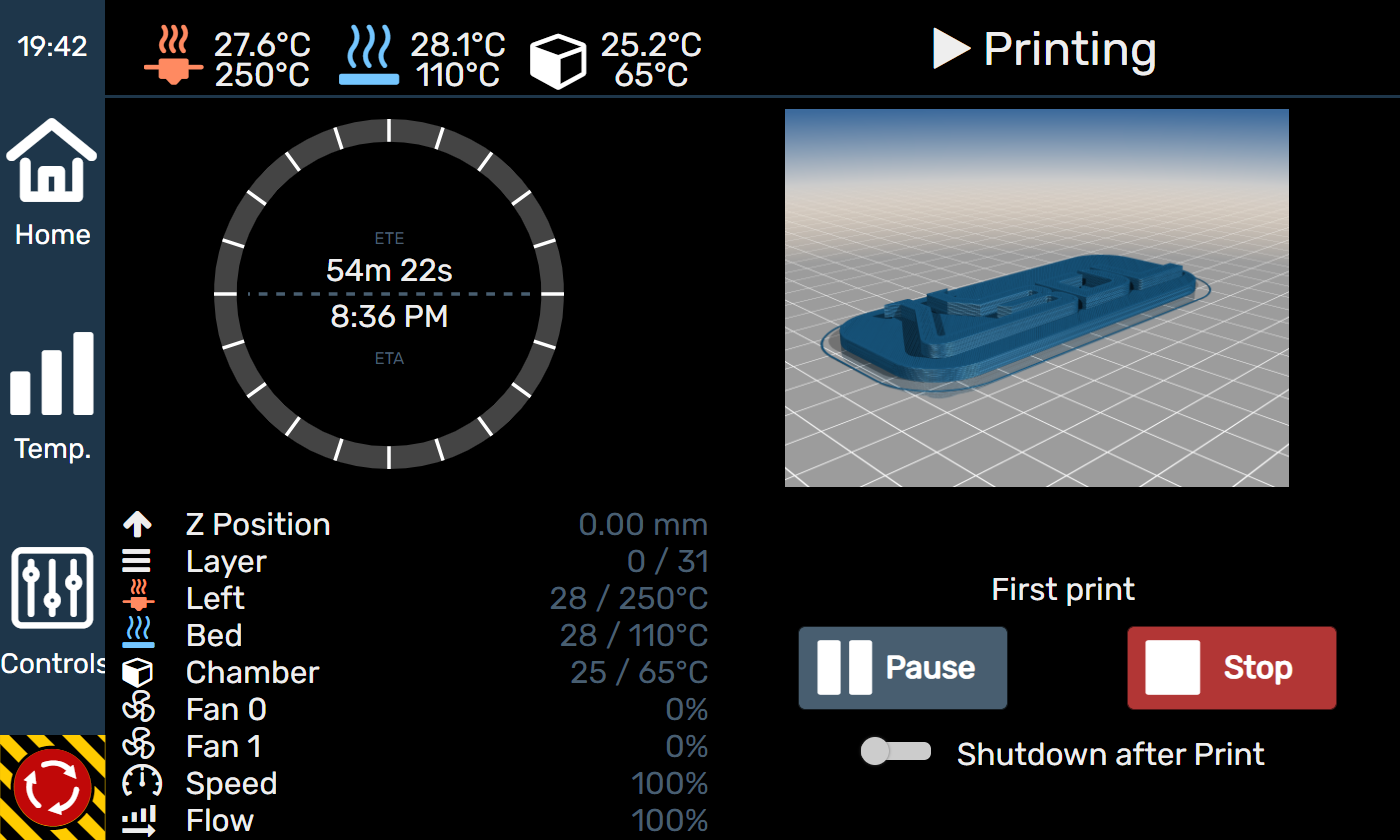
- The printer will being preheating, then the print will start.
¶ Troubleshooting
-
If you see that the first layer of the print is smashing down, or not sticking to the bed, this may mean that the distance between the nozzle and bed is either too far away, or too close.
You can adjust the distance of the nozzle from the bed in real time to get a perfect first layer.
Tip
Your bed and nozzle gap are calibrated at the factory, so this shouldn't be an issue in most cases. However, if the printer is jarred or moved aggressively, the calibration may have been slightly thrown off.
-
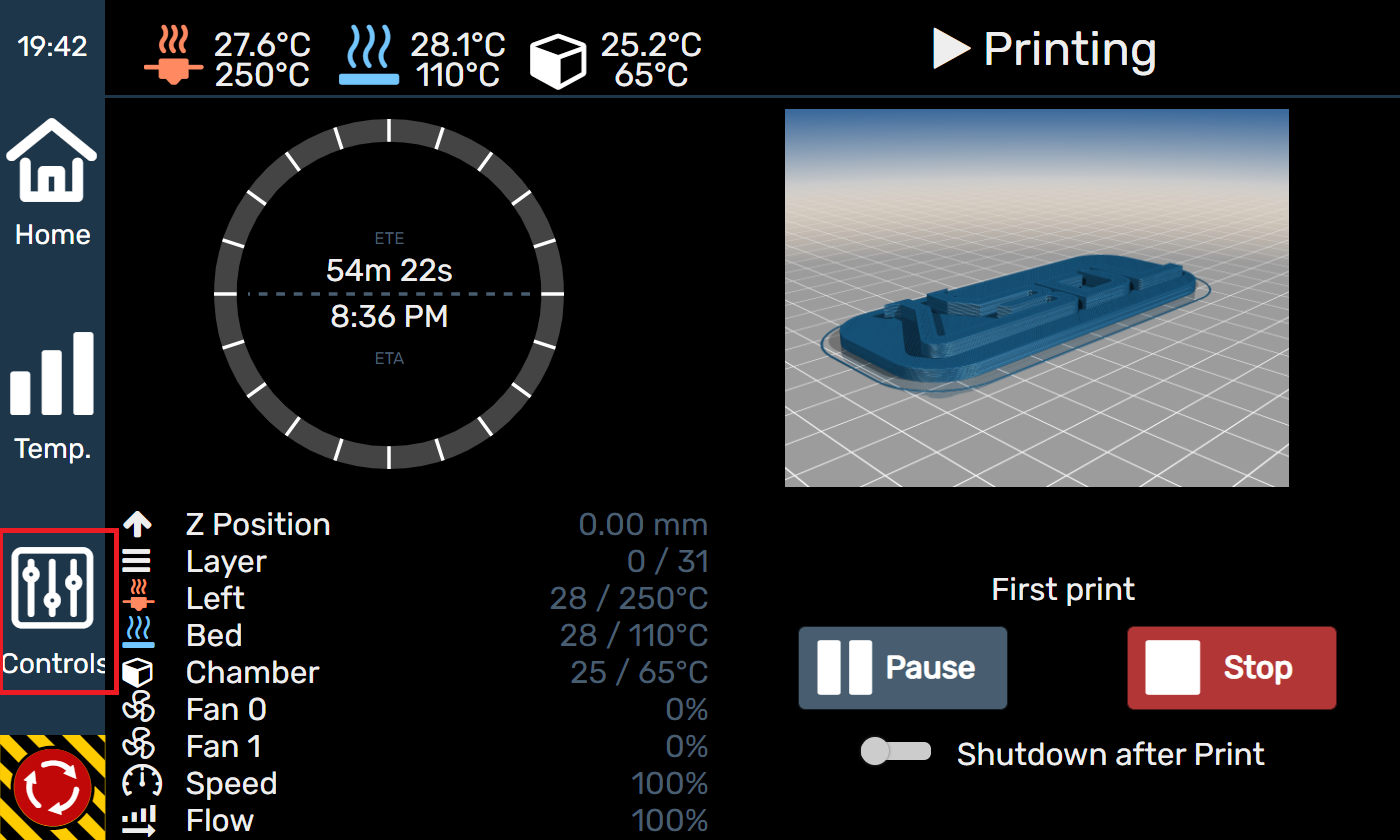
Press Controls on the active print screen.
-
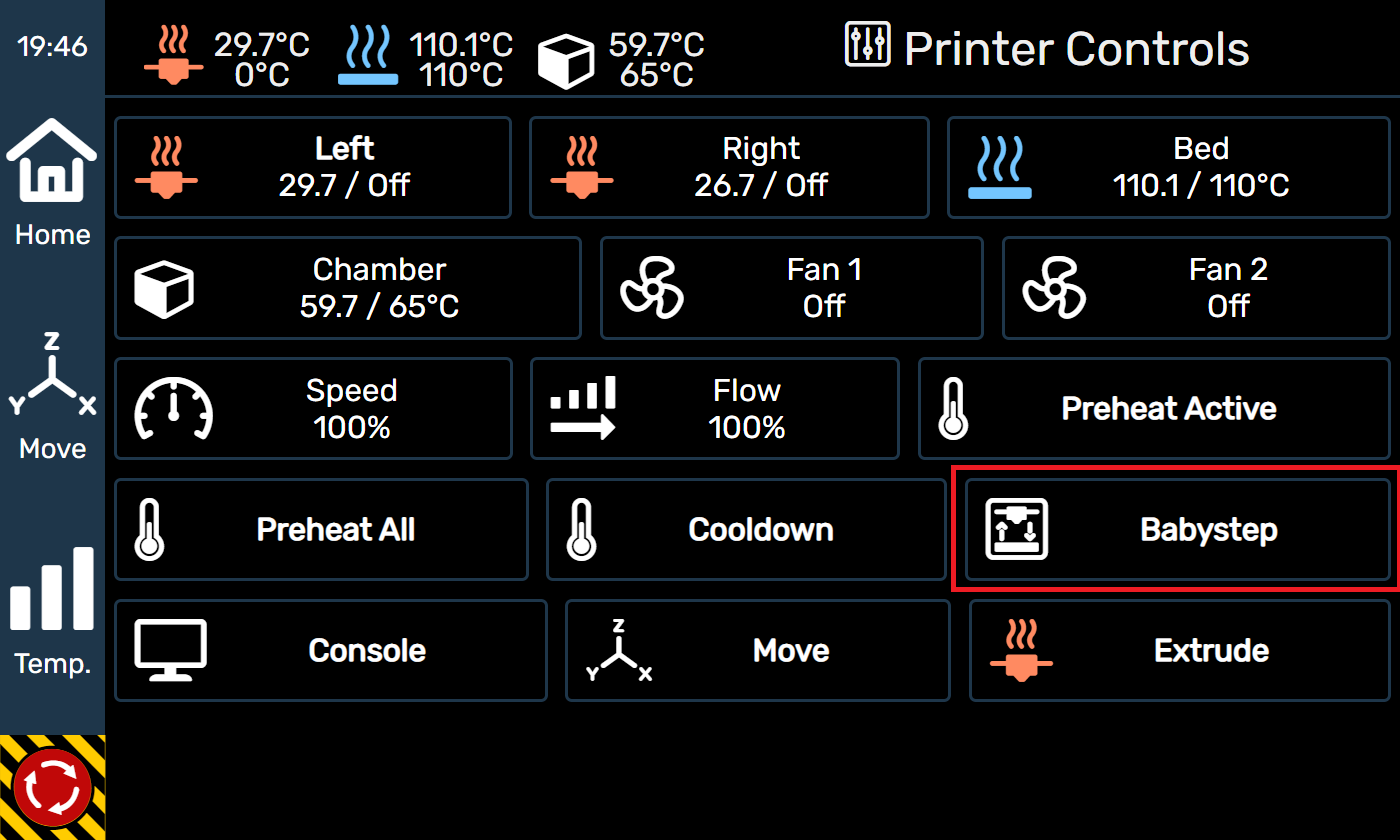
Press the Babystep button.
-
Use the up and down arrows to adjust the distance between the nozzle and bed.
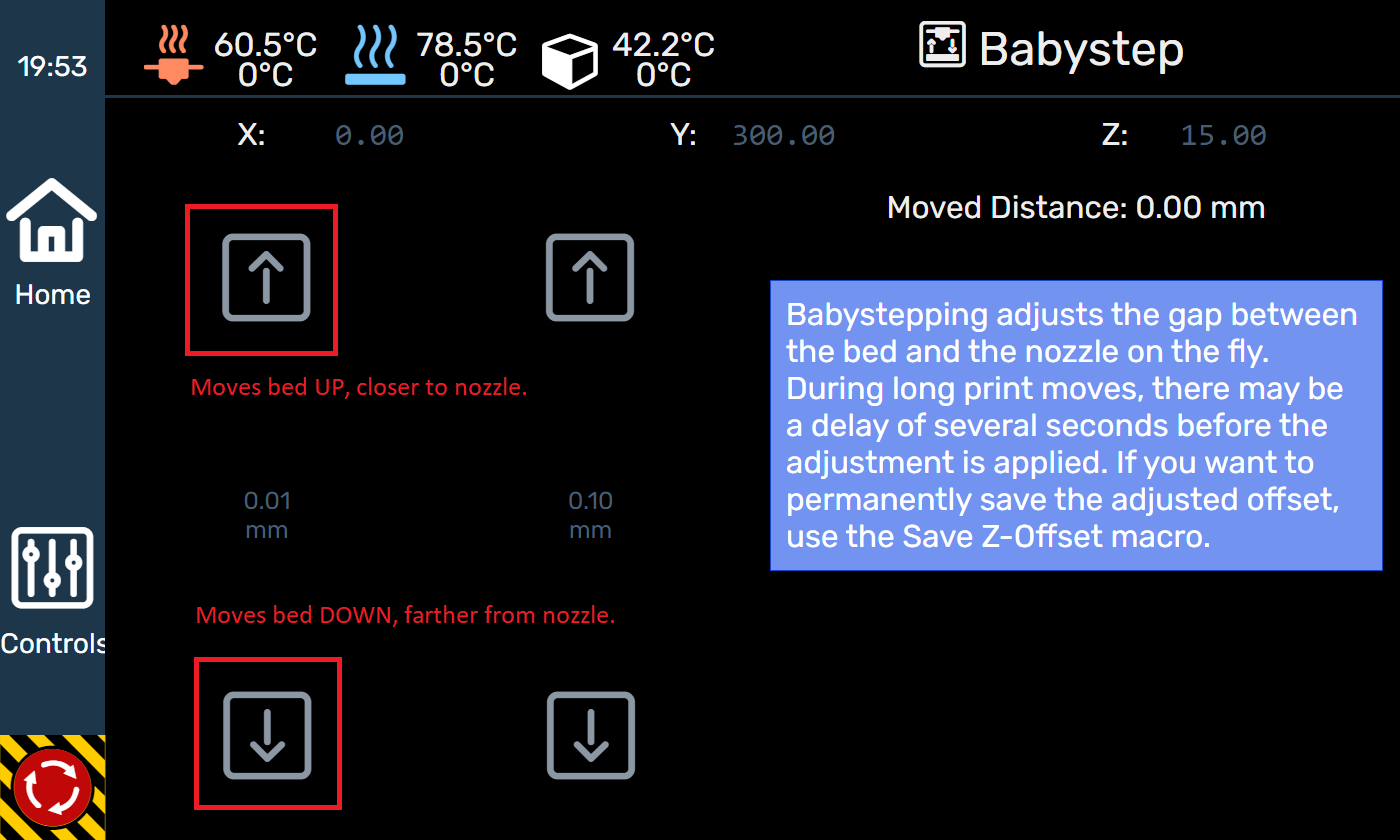
Important
Start with the smallest increments at first. There may also be a delay in the adjustment during a long print move, so be patient!
Tip
The UP arrow moves the bed up CLOSER to the nozzle, decreasing the gap. Apply this adjustment if the first layer appears stringy, or is not sticking.
Tip
The DOWN arrow moves the bed down FARTHER from the nozzle, increasing the gap. Apply this adjustment if the first layer appears to be smashing down, or not extruding at all.