¶ Troubleshooting Z axis triggered
¶ Tools required
- Work gloves
- Needle nose pliers
- Phillips head screwdriver
¶ Synopsis
Certain components or wiring failures may result in the Z-axis probe being stuck in the "TRIGGERED" state. This results in the refusal of the printer to move the Z axis during homing or jog operations as a safety precaution.
¶ Troubeshooting Steps
- Test the Z-axis probe with a multimeter to determine continuity. If the probe doesn't beep when depressing the nipple, the probe may be failed.
- Test the Z-axis endstop in the left front side of the machine with a multimeter to determine continuity.
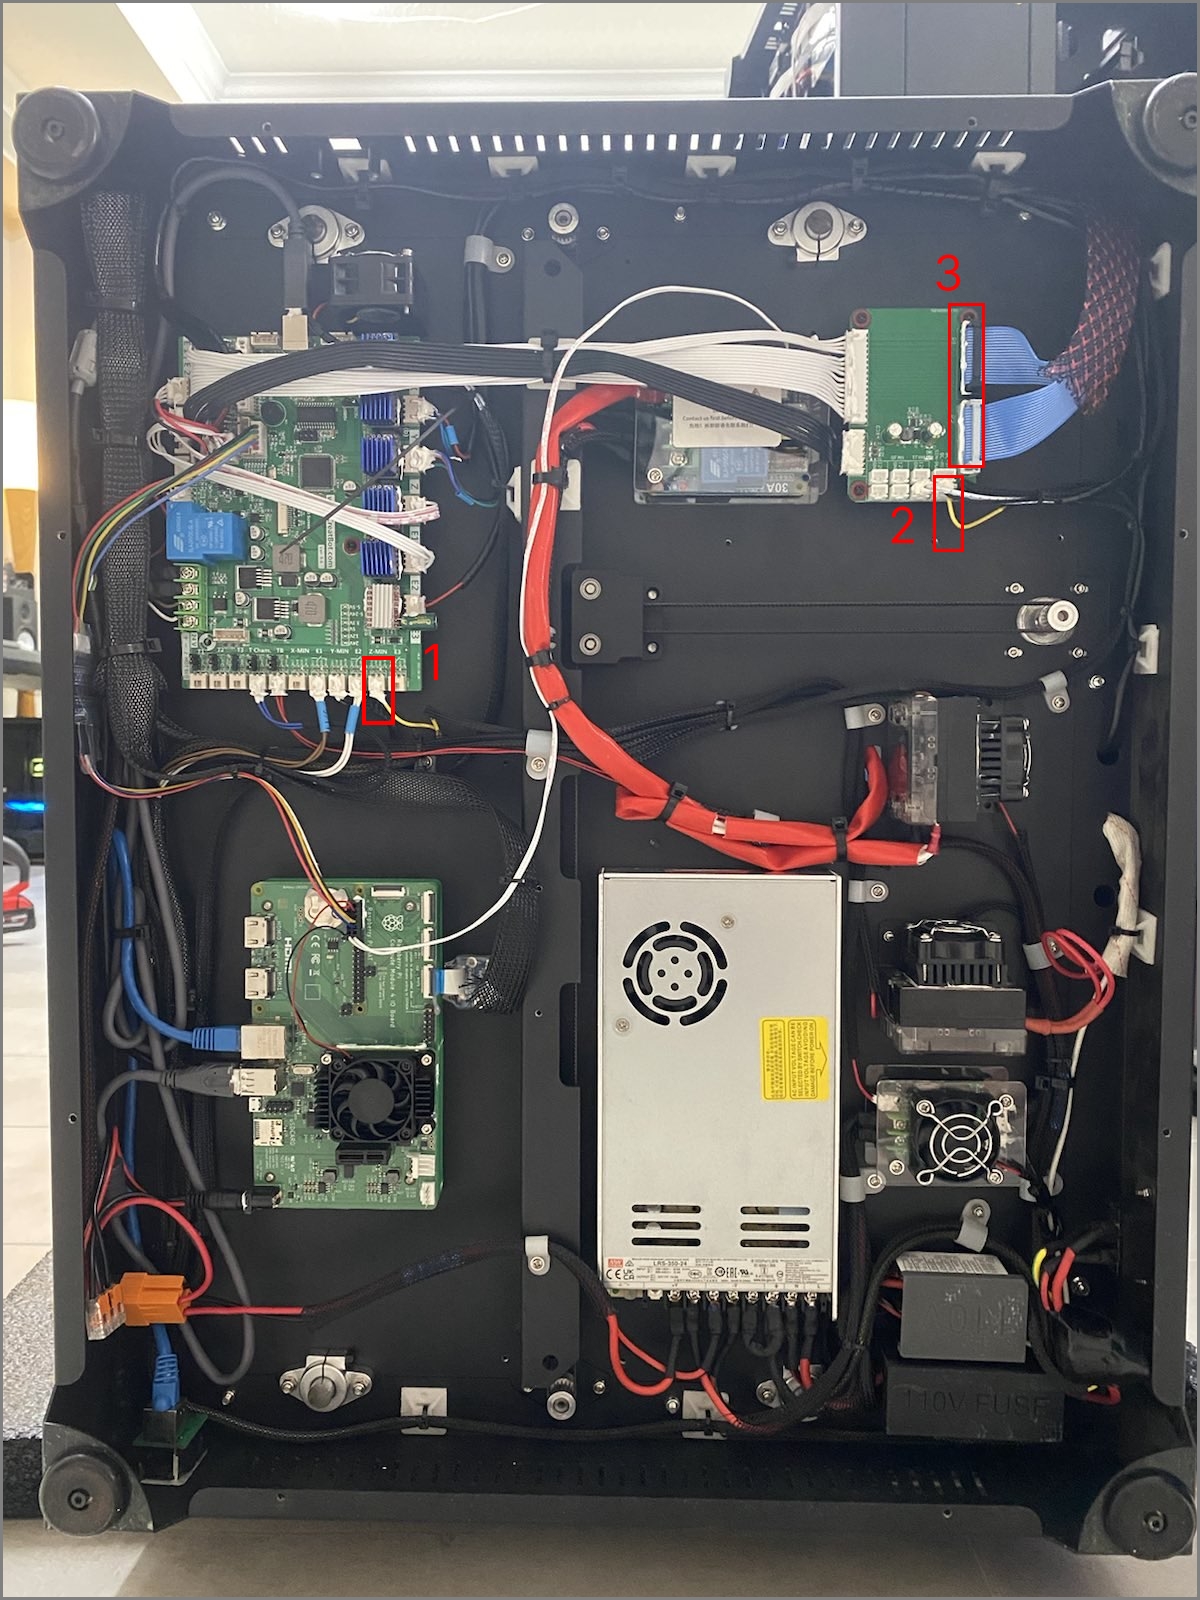
If both of the above successfully pass a continuity test, then try the following 3 steps as outlined in the photo below.
¶ Further troubleshooting
- Unplug the 3D printer.
- Lay the printer on it's side and remove the bottom panel.
Take care to unplug the fan wires as you gently pull the panel away from the bottom of the machine.
- Disconnect the yellow wire shown in notation 1 in the photo.
- Reinstall the service panel with 2 screws to stop it from falling down.
- Plug the 3D printer back in.
- Turn on the machine and issue an M119 command after the printer is booted up.
- If the printer still says the Z position is "TRIGGERED", the mainboard is faulty and needs to be replaced.
- If the Z position is reported as "OPEN", then there is a wiring short somewhere in the path.
- Continue steps 1-8 for each of the wire notations in the photo by plugging in the previous wire you removed, and unplugging it in the next spot noted in the photo. For example, if you just unplugged wire 1, then plug it back in, and remove wire 2. Repeat this until you locate the faulty wire and report the results to 3D Labs Support.